Calamities, Part II

The last time I had a chance to post was in July, just after a series of mishaps and failures of electronics and electrical devices. Now, my next chance to report seems like Deja vu.

A couple of weeks ago, our washer crapped out. We had already been told when we inquired about replacing another part that it was too old to be worth the cost of repairing it, so we decided to replace it. The washer and dryer stack to fit in out closet, so we had to replace the dryer, too. Next, one of my hearing aids intermittently stopped working. Yup, it’s too old to be cost effective to repair! Hearing aids are very expensive, but luckily I had just changed insurance plans, and my new one covered about 2/3 of the cost. Next, our oven stopped heating properly. I thought the broiler element had burned out, and that I could repair it myself (nope). Finally, a shelf system that I was using to store our emergency water supply crashed to the floor, flooding our spare bedroom carpet. Would you call that a series of unfortunate events?

It turns out that the broiler element was not the problem with my stove. There were four possible problems. I replaced the most likely culprit, the broiler element ($100), and it still didn’t work. I was able to test a fuse and the temperature sensor, and determined that they were okay. The last possibility was the control circuit board. It costs nearly $400. The stove was the same age as the washer and dryer, so I was not going to pay $400 to fix it. The good news is I did not pay $150 for a diagnosis to determine that I need a new stove. Nope, a new stove with modern improvements, and why not replace the countertop microwave with a matching over-the-stove microwave, also with modern conveniences?

Although the washer and dryer work don’t hold as much as the old ones, they are great and are much quieter. I’ve gotten the new hearing aids, and I’m happy that they are rechargeable, rather than needing new batteries every few days. They also have some modern, convenient features.

The water mitigation company told me that my homeowners insurance probably would not pay for the cleanup. I decided to put in a claim anyway, and fortunately Pemco covered it–the bill was $4,000! (Of course that incident happened at night on a weekend.) We had already decided to replace the carpet in that bedroom and the master bedroom with laminate flooring, so I had the remediation company rip out the carpet. The new flooring will not be covered by insurance.

The new stove has arrived. I like it a lot, although I haven’t gotten to try out all of its features yet. It looks like it will be great for baking bread, and I’ll try that out soon. But the installer could not install the microwave because it needs an outlet above the stove. The range hood is hard wired. So next on the list is an electrician to install the outlet and then call the installers back for the microwave.

The flooring installation is scheduled for April. We wanted to wait until our Covid vaccinations had fully taken effect. It will be a major, all-day job, so we will vacate the house and stay at a hotel. Hopefully, this will be the end of our major replacements for now.

There is only one appliance left to fail–the refrigerator.

Computer Woes

It used to be that I liked digging into a computer, setting it up, and learning about software. Those days are long gone! Now, those activities are a pain. So, I was not happy when I accidentally kicked over one of my computers and it stopped working. Fortunately, the computer was one that I use primarily to operate my ham radio equipment, and it didn’t have important data or precious photos on it. Also, I had gotten it refurbished from a school program for $65.

When I told Janie about it, she told me I should get a new computer, but since I am no longer dazzled by the latest and greatest (that’s reserved for radio gear), I didn’t want to spend $400 on a cheap computer. Instead, a new hard drive would work, and it would not be any more of a hassle than setting up a brand new computer. So I ordered the hard drive from (where else?) Amazon, it came a couple of days later and I snapped it in. At first, I didn’t think it was working, but I figured that out and now I am doing the drudgery of reinstalling Windows and all my old programs on the new drive. This time I put the computer where my big feet can’t reach it!

Smoke/Carbon Monoxide Detectors

A couple of months ago, the fire alarm in our building went off, but we slept through it! I acknowledge that we’re hard of hearing, but we have an alarm siren right outside our bedroom. I was so surprised to find out that there had been an alarm that I suspected that something was wrong with the alarm and we had it tested. Nope! We slept through it! I’ve thought of several ideas keep it from happening again, including buying or building a device to shake our bed or flash our lights.

I also was aware that it was time to replace the one smoke detector I had in my hallway. Did you know that smoke detectors are supposed to be replaced every 7 or 8 years, depending on the manufacturer? I found that out when I replaced ours shortly after we moved in—I wanted an integrated smoke and carbon monoxide detector. (We’re on the 1st floor right above the garage.) It had reached the end of its life this year.

I began doing some research on smoke/carbon monoxide detectors, and learned that instead of one unit in the hallway, we are supposed to have one in each bedroom in addition to the one in the hall. I also learned that some smoke detectors can communicate with each other wirelessly, so I decided to find units that are compatible with each other.

I decided on these: First Alert SA521CN Interconnected Hardwire Wireless Smoke Alarm with Battery Backup for the hallway, and the First Alert SCO501CN-3ST Battery Operated Combination Smoke and Carbon Monoxide Alarm with Voice Location for each bedroom.


They are LOUD! When you set one off, they all go off together. I don’t think we will be sleeping through this noise! I may still try to figure out how to build an Arduino device that will flash our lights when it picks up the sound of the alarm, but that would be for the challenge rather than to ensure we’ll wake up.

If you have not checked the expiration date on your smoke detector recently, now might be a good time to do it. Also, even if you are “grandfathered” in the fire code for the number of smoke alarms you need, it might be a good idea to consider adding them in each bedroom.

Halloween 2017

Happy Halloween! On Saturday, we had our annual pumpkin carving extravaganza. This was one of the best years yet, since we extended it over two days (and were less exhausted), and because both Janie and Kathryn joined in. In recent years, Kathryn has not always been home from school, and Leslie and I sometimes helped Emma and Sarah with their pumpkins rather than doing our own.

Emma and Sarah got out of school early on Friday, so I picked them up and we were the advance team to pick out the pumpkins. We accomplished that in short order. That night, we cleaned out all the pumpkins.  

Emma is allergic to pumpkin meat, and Kathryn was not arriving until later, so we cleaned theirs for them. Janie tried a new technique for crispier roasted pumkin seeds, so she and Emma cleaned and boiled them that night for roasting the next day.

The next morning, Kathryn joined us and we did the actual carving. Janie roasted Italian savory and cinnamon-sugar pumpkin seeds. The girls no longer need our help, so they picked their own designs and carved them. This year, we produced 6 pumpkins!


The aftermath.


In the video (click on “video”), Sarah’s Tinkerbell is on the left. Next is Kathryn’s “Ron Burgandy” from Anchorman. Leslie had a more traditional Jack-o-Lantern. Janie experimented with the melted-crayon creation, and I exeperimented with an Arduino-controlled monster. On the right is Emma’s Moon and Stars creation.

The Arduino.

Later, we went out to dinner and came home to watch The Great Pumpkin. Another successful year!


Janie created this lighted tree as a fall decoration. Don’t tell the HOA, but we put it out in the hallway for Halloween!


Belt and Suspenders

If you or someone in your household don’t back up your computers, you will eventually become one of those people who say “My computer crashed and I lost all my files–and precious family pictures. I am paranoid about computer backups. Not that I am that good at it, but I’ve tried to build redundancy into my backup system because I have had drive failures when I thought I had a backup. For that reason, I use a service called CrashPlan, which is free for a single users, and reasonably priced for a family plan. You don’t need to remember to back up (for the most part)–it backs up automatically in the background whenever the computer is on. I said for the most part, because you need to leave the computer on and connected to the internet for long enough periods that the backup can be completed.

For me, CrashPlan isn’t enough. What if the internet is down? What if CrashPlan were to go out of business? There are many reasons that any single backup point could fail. I have a sort of complicated set up. Because I am paranoid, I not only back up to CrashPlan, but I have two external drives connected to my network. I have two because my first drive ran out of room, so I got a newer, larger drive a couple of years ago. I still use the older drive to store photos and videos because the hard drive of my main computer no longer has room. 

My second external drive is used to store backups of my web site. These files are too large to store on my computer or my original external drive. I also back up my desktop computer to that drive. That drive is in turn backed up to CrashPlan, so there is some redundancy.

I recently discovered that my larger external drive was not working. I haven’t figured out why. Fortunately, by desktop computer is backed up on CrashPlan, and my web pages are also backed up by by web host. This is why I’m paranoid about backups, and why I think it is essential to have two independent backup systems. Also, backups should be automatic. Otherwise, you will forget to do them, or you will be busy at the time you should be doing them. Backing up my website files is not automatic for me, and I hadn’t backed them up since February. I don’t know how long my external drive has not been working, because I hadn’t checked since I downloaded my website files in February. Fortunately, I have the web sites backed up on line, and my web host backs them up separately.

I got my drive working again, and I backed up my website files again. I also made myself a calendar reminder to it monthly. Since then, my backup drive has stopped at least once more without warning. I got it restarted, but I can’t rely on it without checking periodically. I also discovered that the the program I use to back up (in addition to CrashPlan), which is supposed to send me an email when a backup fails, is not sending me the warning emails. That would have alerted me that the backup drive was not working. 

Wonder why I am paranoid about backups? What would happen if your hard drive failed tomorrow?

My New “Toy” – Ardu-who-no?

Having explained this to a couple of people recently, I realized that what is very familiar to me may be totally foreign to some of my circle. So, if you’ve never heard of them, I will describe what an Arduino is as well as some related devices.

An Arduino is a type of microcontroller. I’m not going to go into too much detail, but think of a microcontroller as a chip that acts as the brains of many smart electronic devices. Probably some of the more familiar devices would be robots, such as our Roomba vacuuming robot, or a device that works with a remote control. Lots of things have microcontrollers in them. The Arduino and similar devices are hobbyists’ versions of these devices. You can use them to make automatic controls—such as something to water your plants—or build robots.

The Raspberry Pi and similar devices are different. They are called single-board computers. They are literally $35-50 computers, smaller than a deck of cards. They can also be used by hobbyists to build things. While there is some overlap, they usually are appropriate for different applications. That’s all I am going to explain.

One thing these devices have in common is that they work with computer programs, and I have always been interested in computer programming. I have done a little of it over the years, having written a program to calculate child support, created pretty complex macros for Excel spreadsheets and other kinds of fairly simple programs. I will never make it as a Programmer, but programming for me is like crossword puzzles for a lot of people.

The new “toy” I got was an Arduino Starter Kit. It comes with the microcontroller on a circuit board and all sorts of parts to do things like measuring temperature and light, light blinking, making sounds, and a bunch of other things. The kit came with a book of instructions for designing the circuits and writing the programs that control them. Unfortunately, I will have to learn a new programming language in order work this stuff, but that’s part of the point of the kit. While I am spending more time at home helping Janie out, she is indulging yet another geeky whim of mine by encouraging me to get the kit.

I heard a guy on a podcast say recently that it is better to learn this stuff with a project in mind or a problem to solve. In general, I would agree, but I’m still at the stage where I don’t know what I don’t know. So, going through the exercises in this kit will give me an idea about what projects I might want to do. After I get deeper into the Arduino, I’ll move on to the Raspberry Pi, and see what it can do. (When I told Leslie that I was interested in the Raspberry Pi, she asked in all seriousness “You’re going to make a raspberry pie?” Sorry, Leslie, that will come later.) My interest in these devices was rekindled after getting involved in ham radio, because I learned that there were several applications that could be used in that hobby. As I learn about their capabilities, I can decide what problems I want to solve it radio or one of my other hobbies.

More Geeky Stuff

Although I haven’t had much time to play lately, I have been doing more with the new ham radio hobby. First, I had been studying to upgrade my license from “Technician” to “General,” which gives me more extensive privileges on the radio. It won’t have much practical effect for now, but I’m glad I got it done.

I’ve had a couple of opportunities to go to the workshop, and I went to a ham radio group picnic. While at the shop I started on some homemade ham antennas.

The picnic was to include an “antenna party” where we could get help from more experienced hams in building our own antennas. I wanted to get a head start, because I knew I needed to have some of the parts ready in advance.

This is kind of a unique antenna, since it does not include a physical connection between the radio and the antenna. The walkie talkie clips on to a bracket on the antenna, and those rods (elements) are supposed to enhance the signal. I don’t have high hopes for it, and I haven’t had time to test it, but it was in interesting experiment.

The second antenna does have a wire connection to the radio. I haven’t had a chance to test this one either. It isn’t pretty, but it’s more likely to work. Both are intended to be more or less portable.

It’s a Good Day for Ham (Amateur) Radio in the Gallaher House!

Not only did I get my antenna moved to a higher location, but my new radio arrived today! I haven’t even set up the radio yet, but the change in the antenna has made a world of difference!


This is the old antenna installation. It consists of a specially cut set of wires inside a 5′ PVC pipe. There is nothing wrong with the antenna itself, but I live on the first floor of a condo that is at about sea level. With antennas, higher is better. Although it is attached to an additional length of PVC and mounted on a fence, it is not high enough.


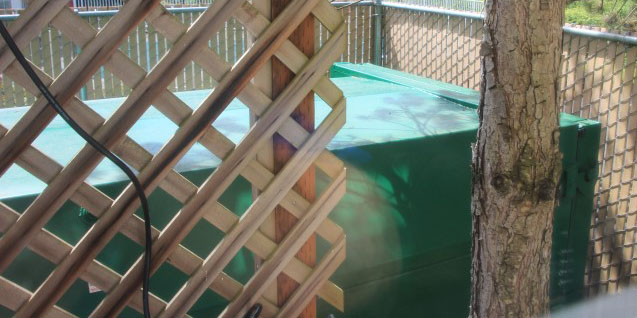
To add to my problems, I have this big old trash compactor next to my antenna installation. I don’t know if it caused any problems itself, but I doubt that it helps, and t suspect that it’s electrical connection may be causing some of my problems.

To make matters worse, communications on the frequencies I use are made using “repeaters,” (sort of analogous to cell towers). The repeater I am most interested in using is on Queen Anne Hill in Seattle and there is a very high hill between me and the repeater.  Another problem, not quite pinned down is loud noise coming from some electrical source near me. The static made it almost impossible for me to hear others who were using the repeater. I hoped that raising the antenna would reduce the noise problem.
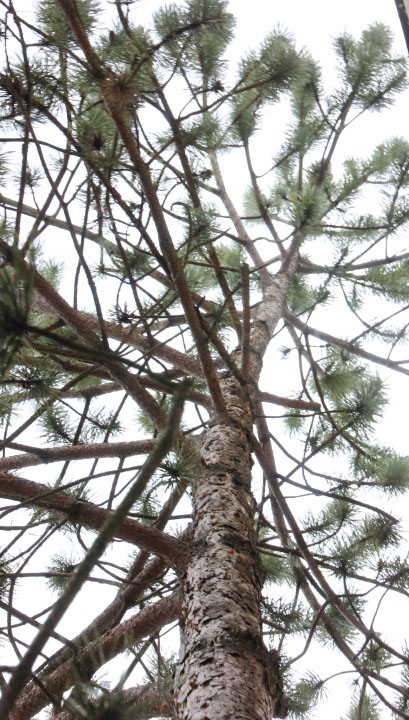
This is a shot taken nearly straight up into the tree I wanted to put the antenna in. Since I live in a condo, I needed the HOA board’s cooperation to install the antenna. Even my original antenna setup was a violation of the rules,  I painted the antenna to match the color of our siding and it was very unobtrusive, so no one complained. The HOA board was cautious about letting me put an antenna in a tree. This is partly because I am on the board, and they didn’t want it to appear that there was favoritism. They wanted to be sure that the installation wouldn’t cause any damage or be unsightly. They asked for comments from the community on Facebokk, and the comments were either favorable or indifferent. My pitch to the community centered around the emergency preparedness benefits. I am involved in a local ham radio emergency group and I am learning as much as I can about how ham operators help in times of emergency. The installation was finally approved.

The next obstacle is that the tree I thought would be best for the installation turned out to be too close to the building. It was damaging the roof and had to be taken down. (The tree in the above picture is a different tree.) That led to a big project to inspect the entire grounds and to have a tree service do a major tree pruning, trimming and removal of some trees. The good news was that they would need a bucket truck to do some of the work, and they could install an pulley in a tree so that I could haul the antenna into the tree. The bad news was that I had to wait until the work got scheduled. All in all, I’ve been waiting to get this done since February for this project to get done. Today was the day!

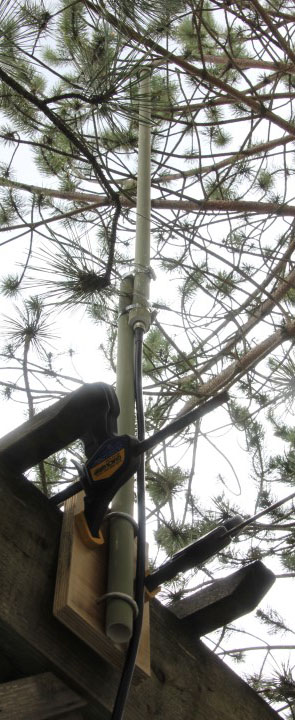
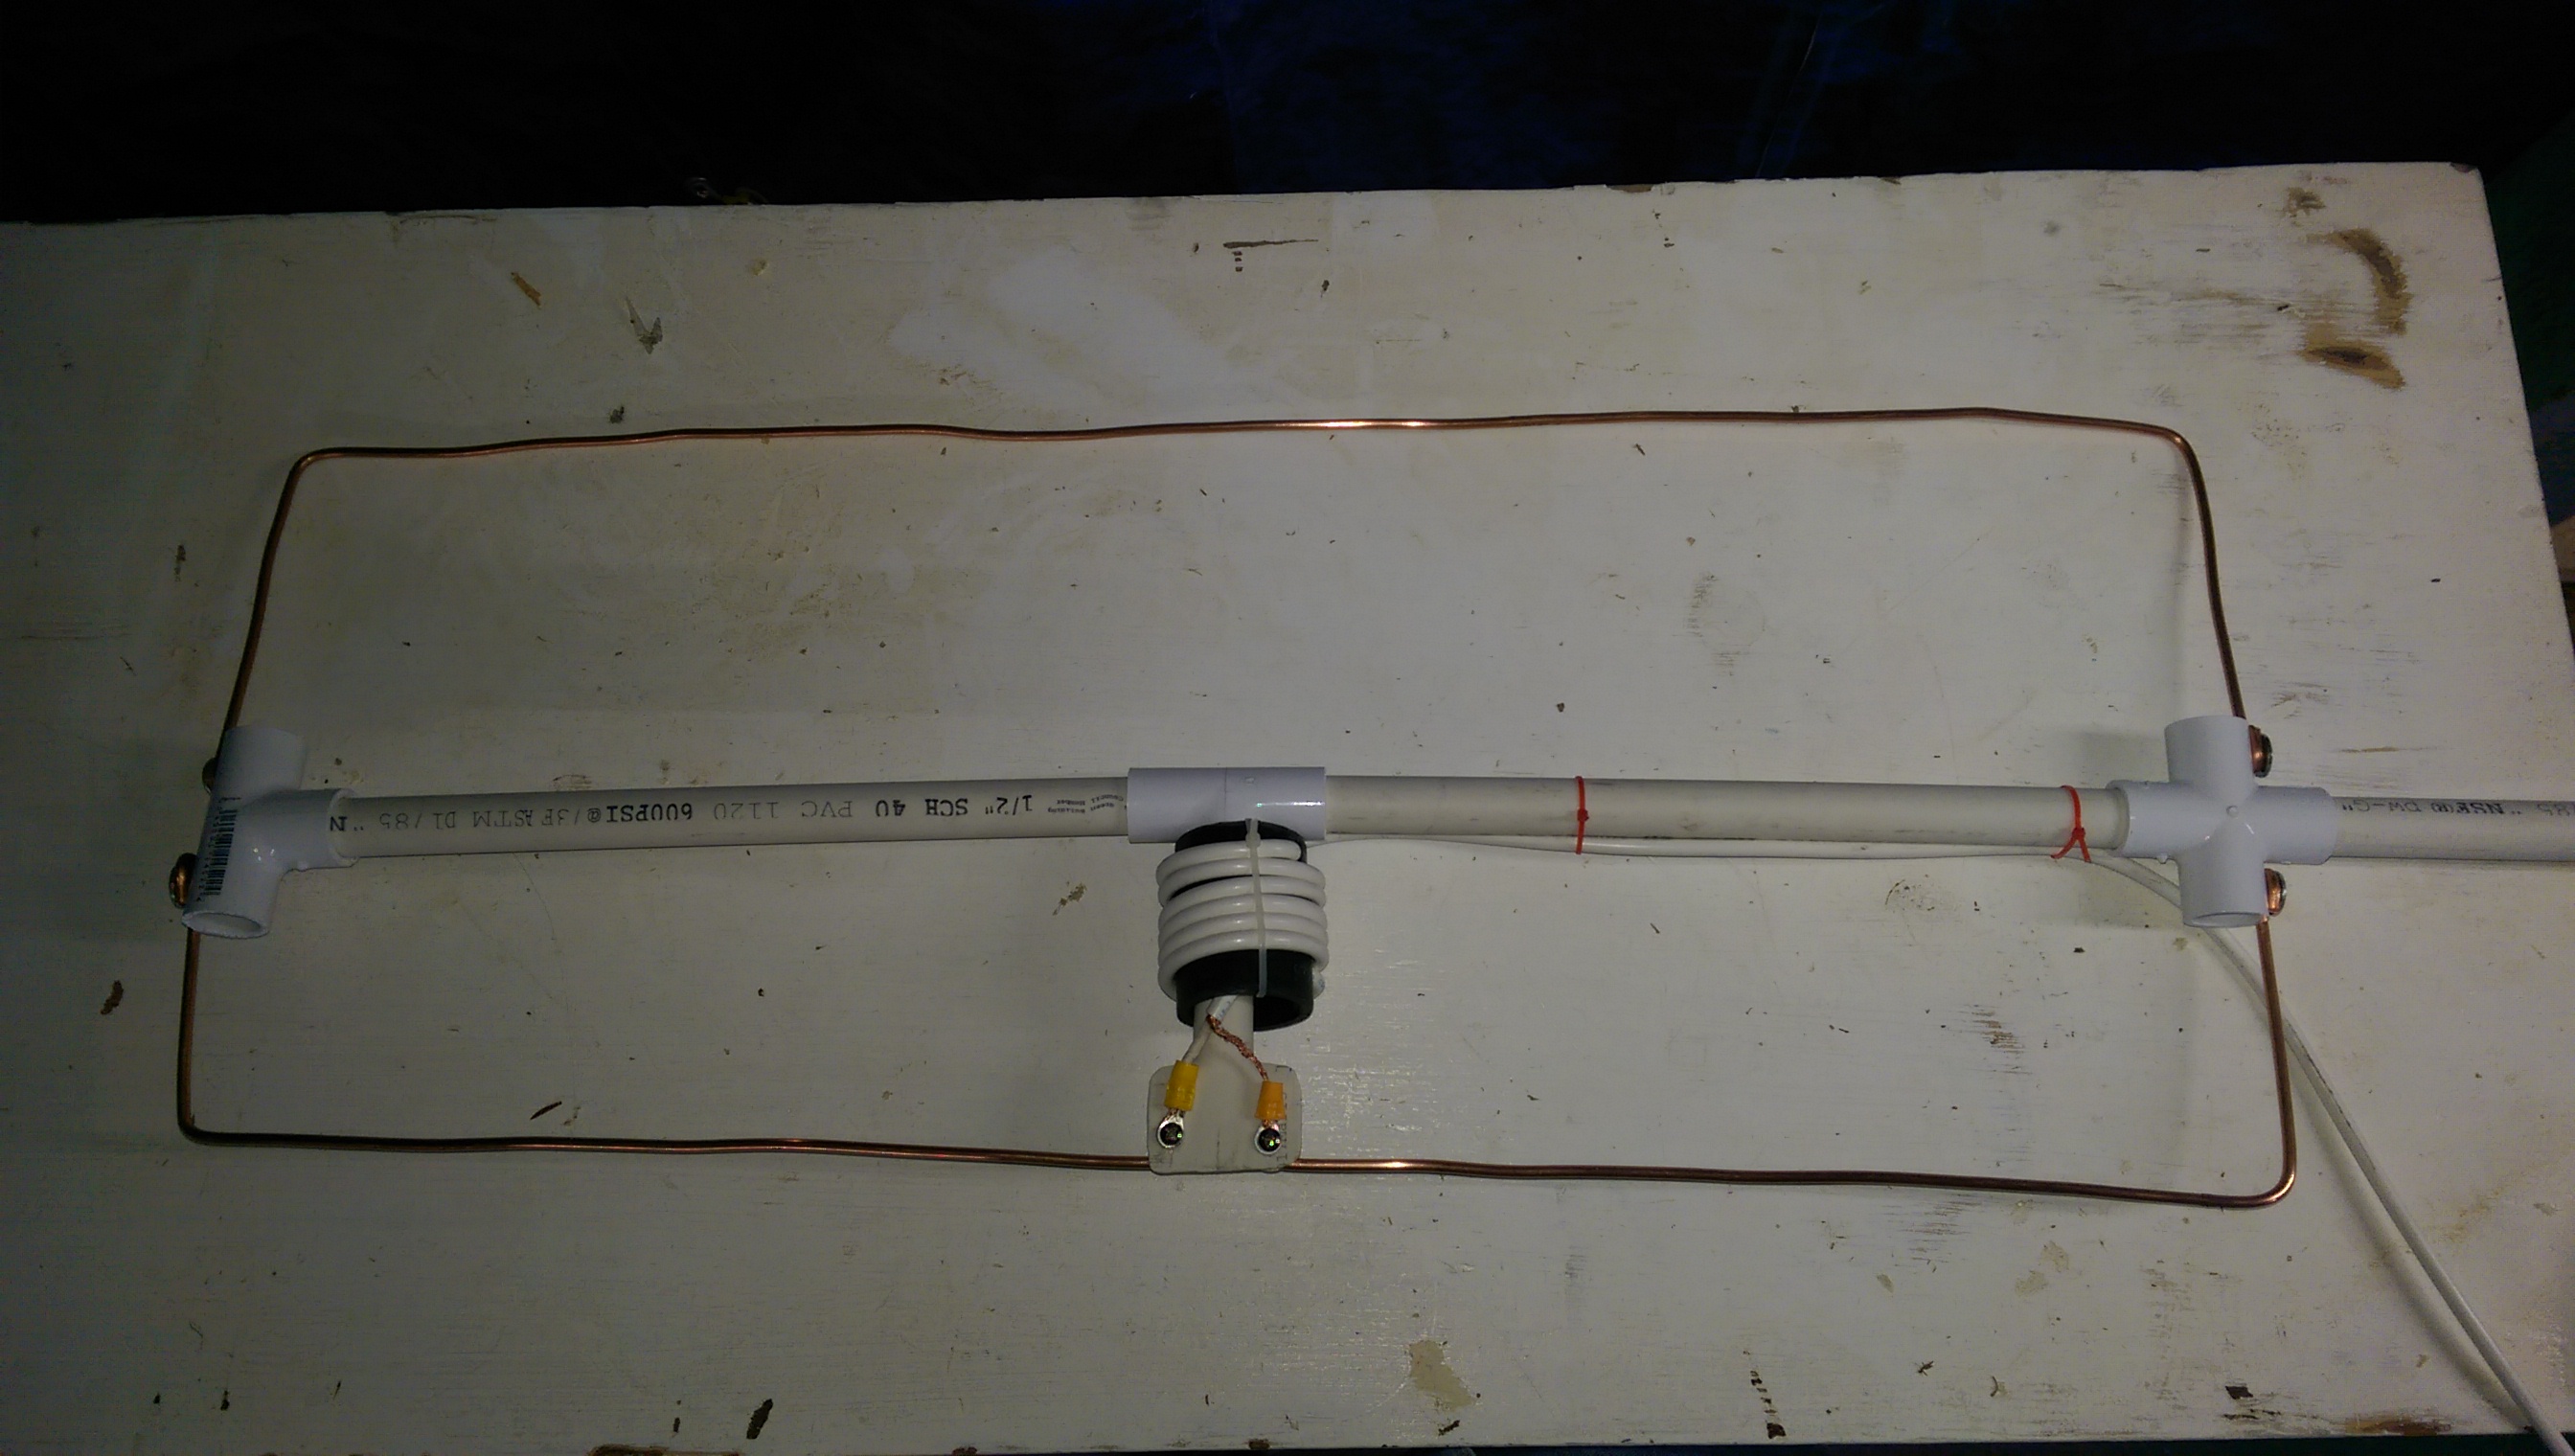
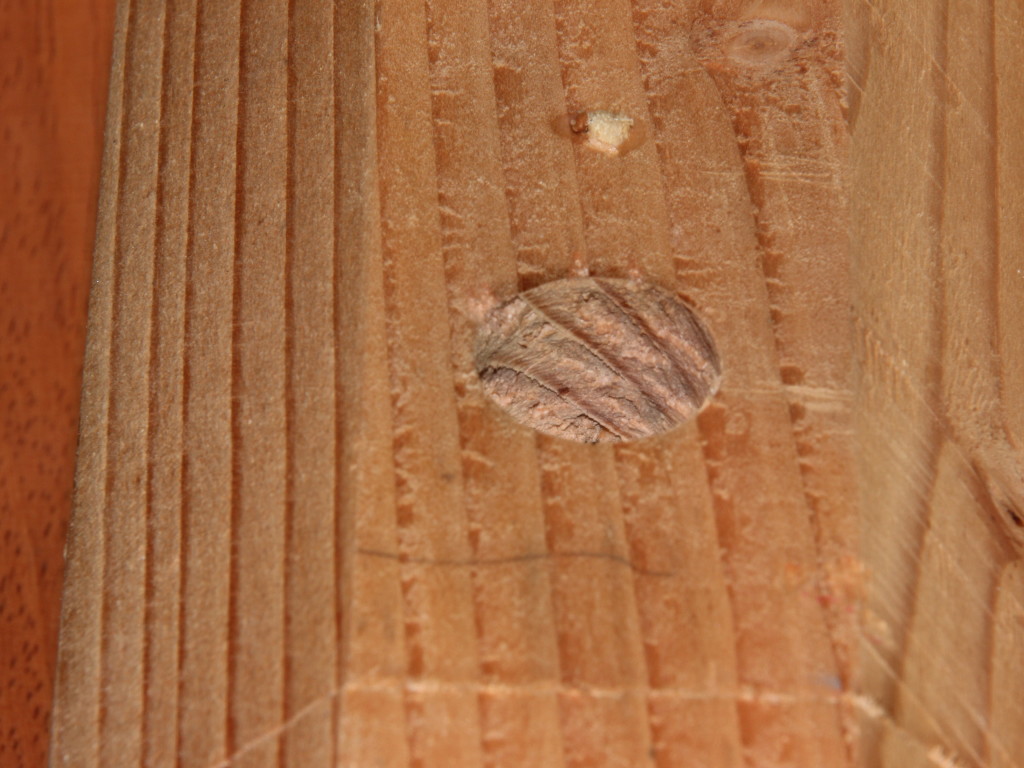
Down came the old antenna. This is what it looks like, attached to an additonal section of PVC. I planned to replace the antenna PVC with a new piece painted to better blend with the tree. I don’t need the additional piece any more.

This is what it looks like outside of the pipe. A pretty simple looking piece of wire, engineered by professer at UC Santa Cruz and built by his students to raise funds.

This morning, the cavalry arrived!

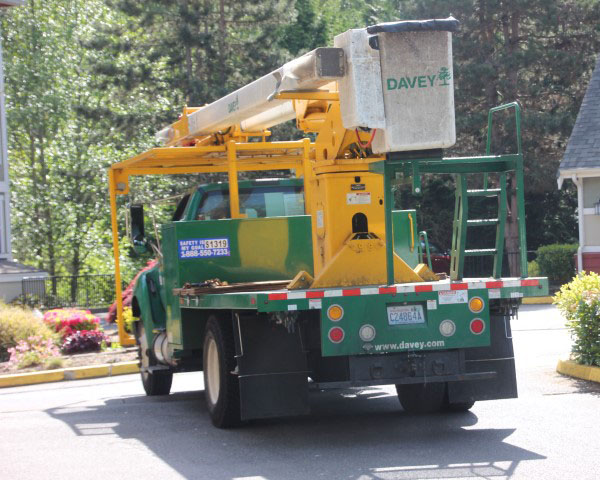
Jason from the tree service headed up to the top of “my” tree. As a balloonist, I wished that I could go up in the bucket truck with him, but no such luck!

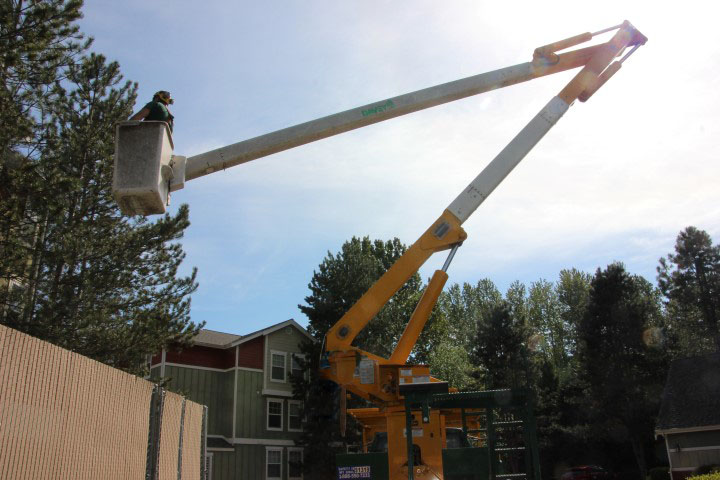
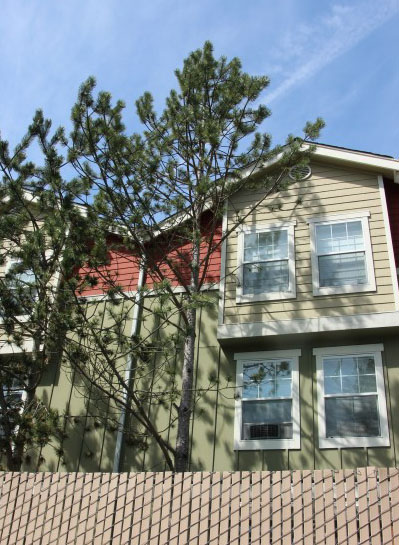
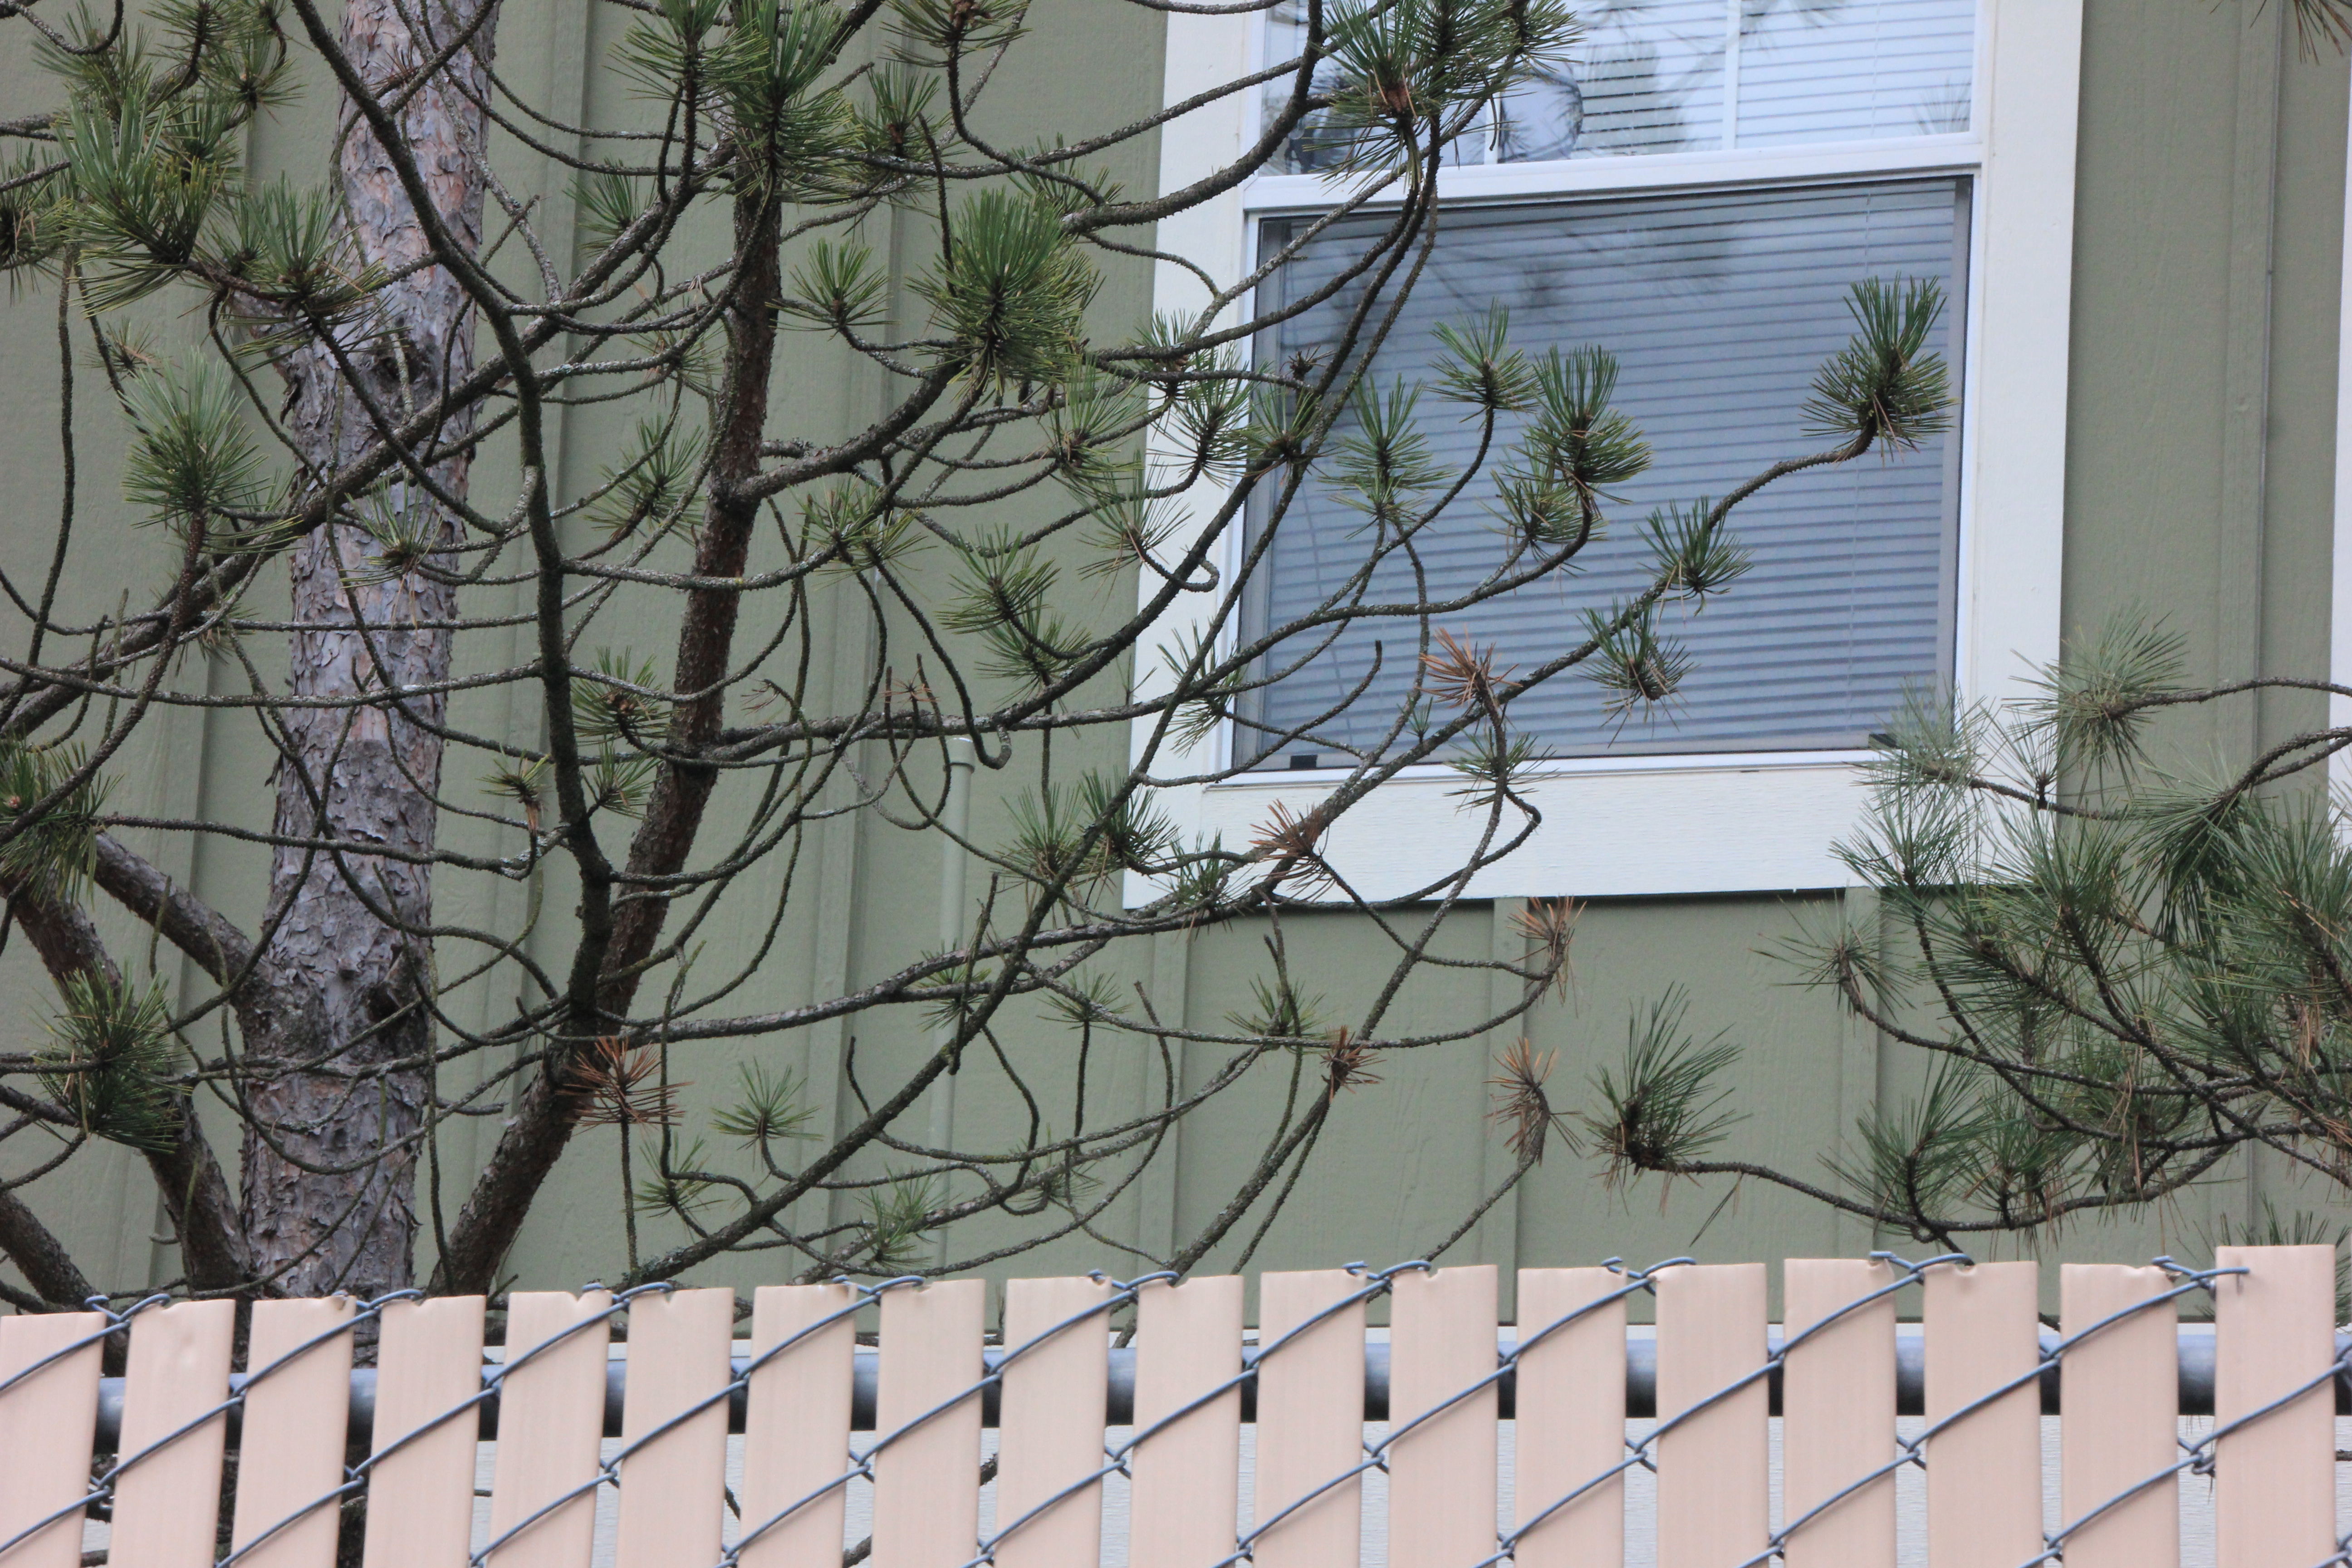
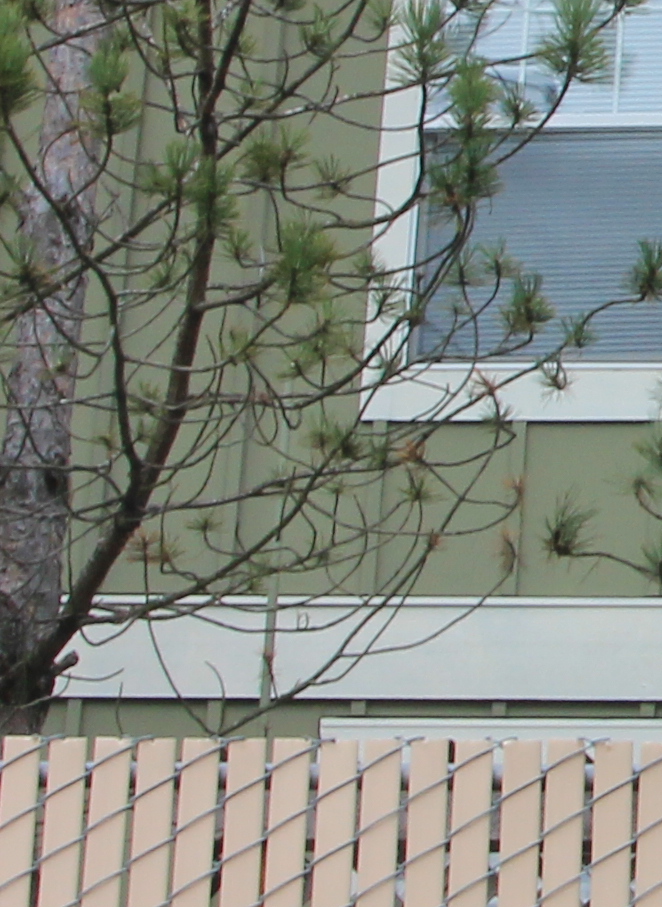
“My” tree is the one on the left. The one to the right of the windows is the one that had to come down. This is the 3rd floor unit. I’m on the first floor.

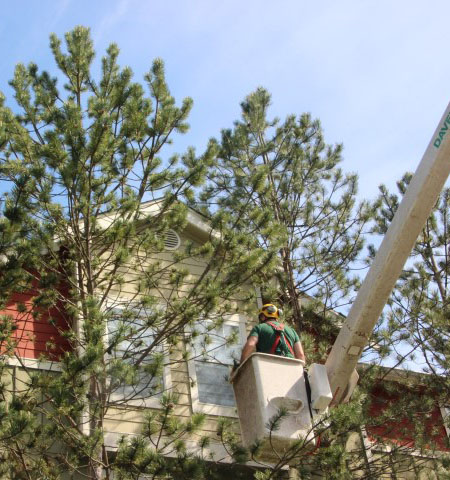
Here is Jason installing a pulley and some paracord near the top of the tree. The bottom of the antenna is about even with the eaves, so most of the antenna is above the roof line.

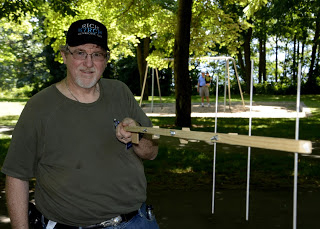
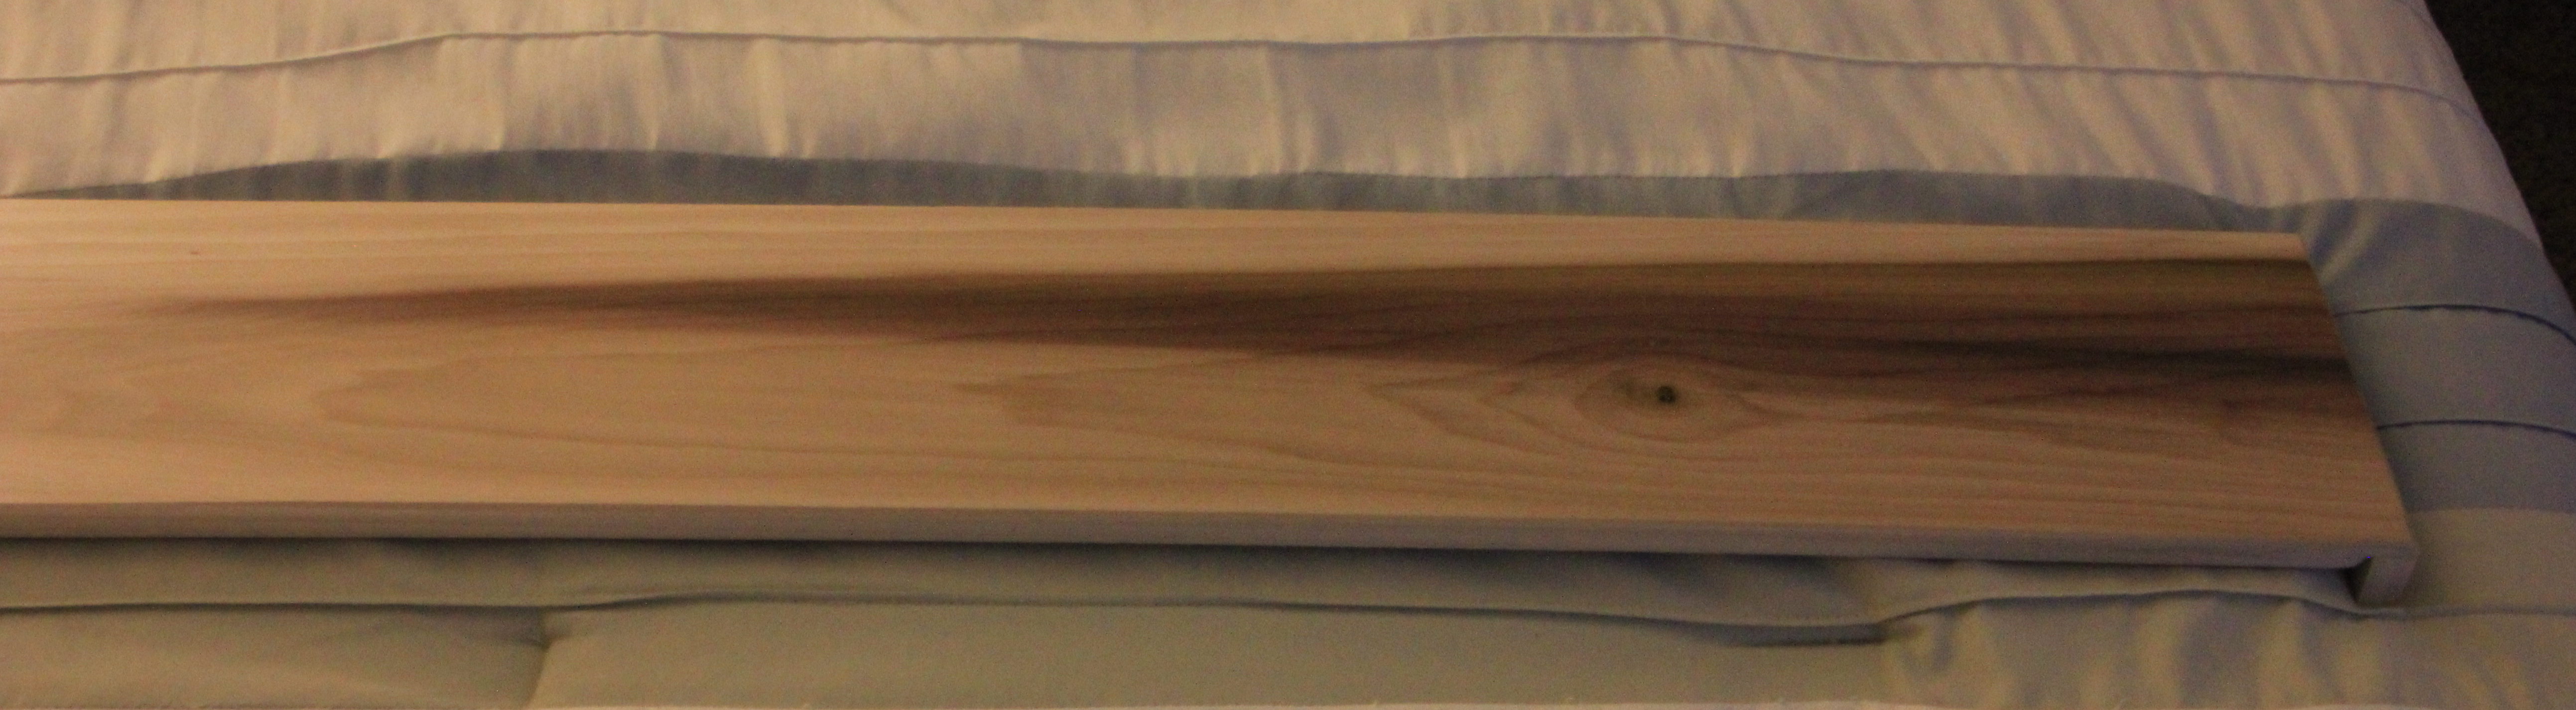
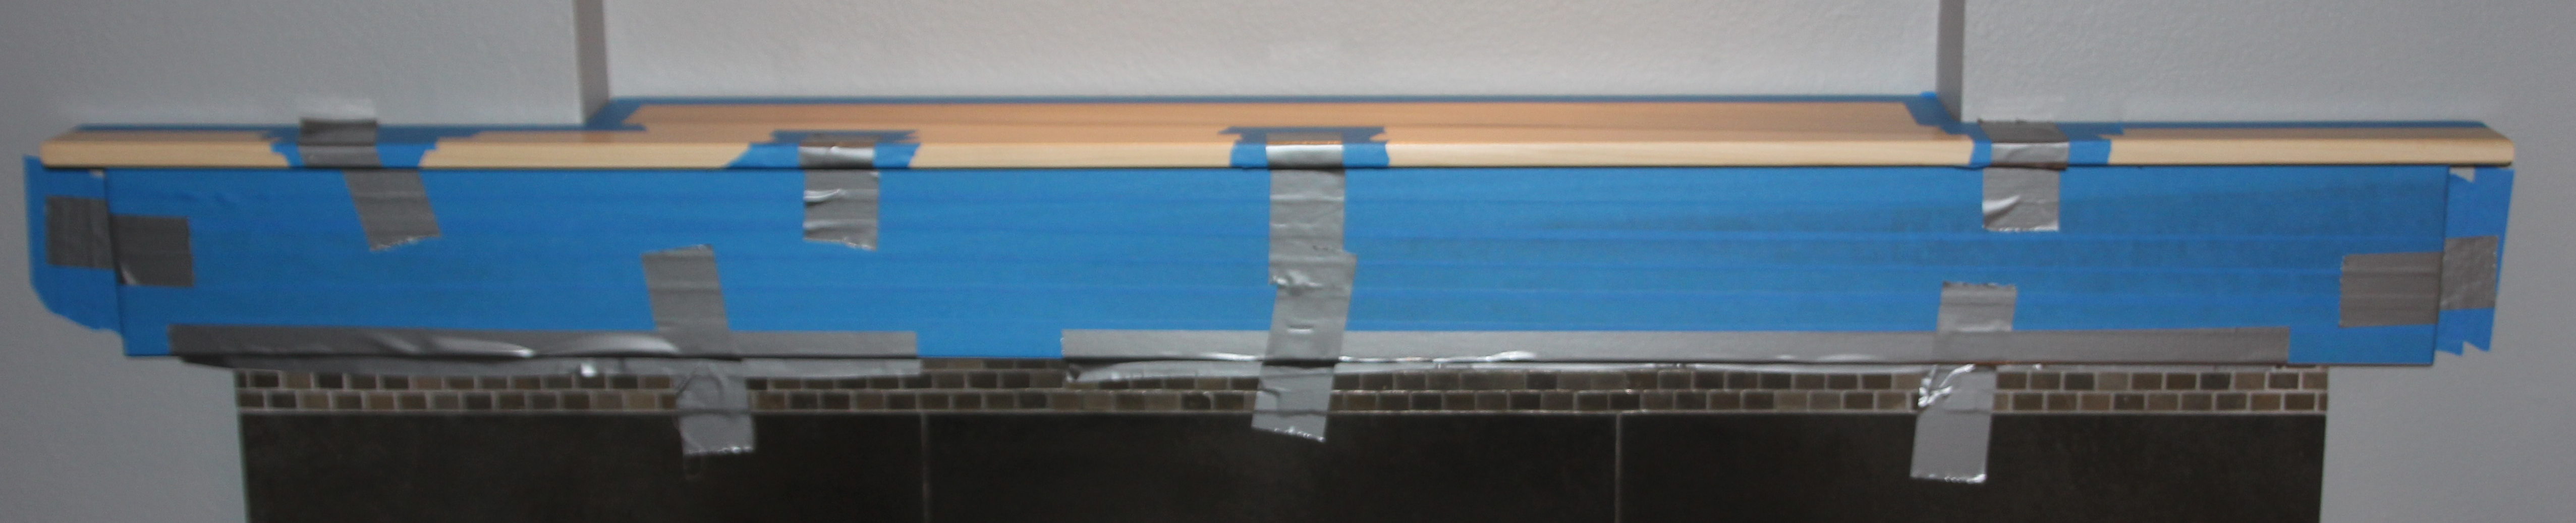
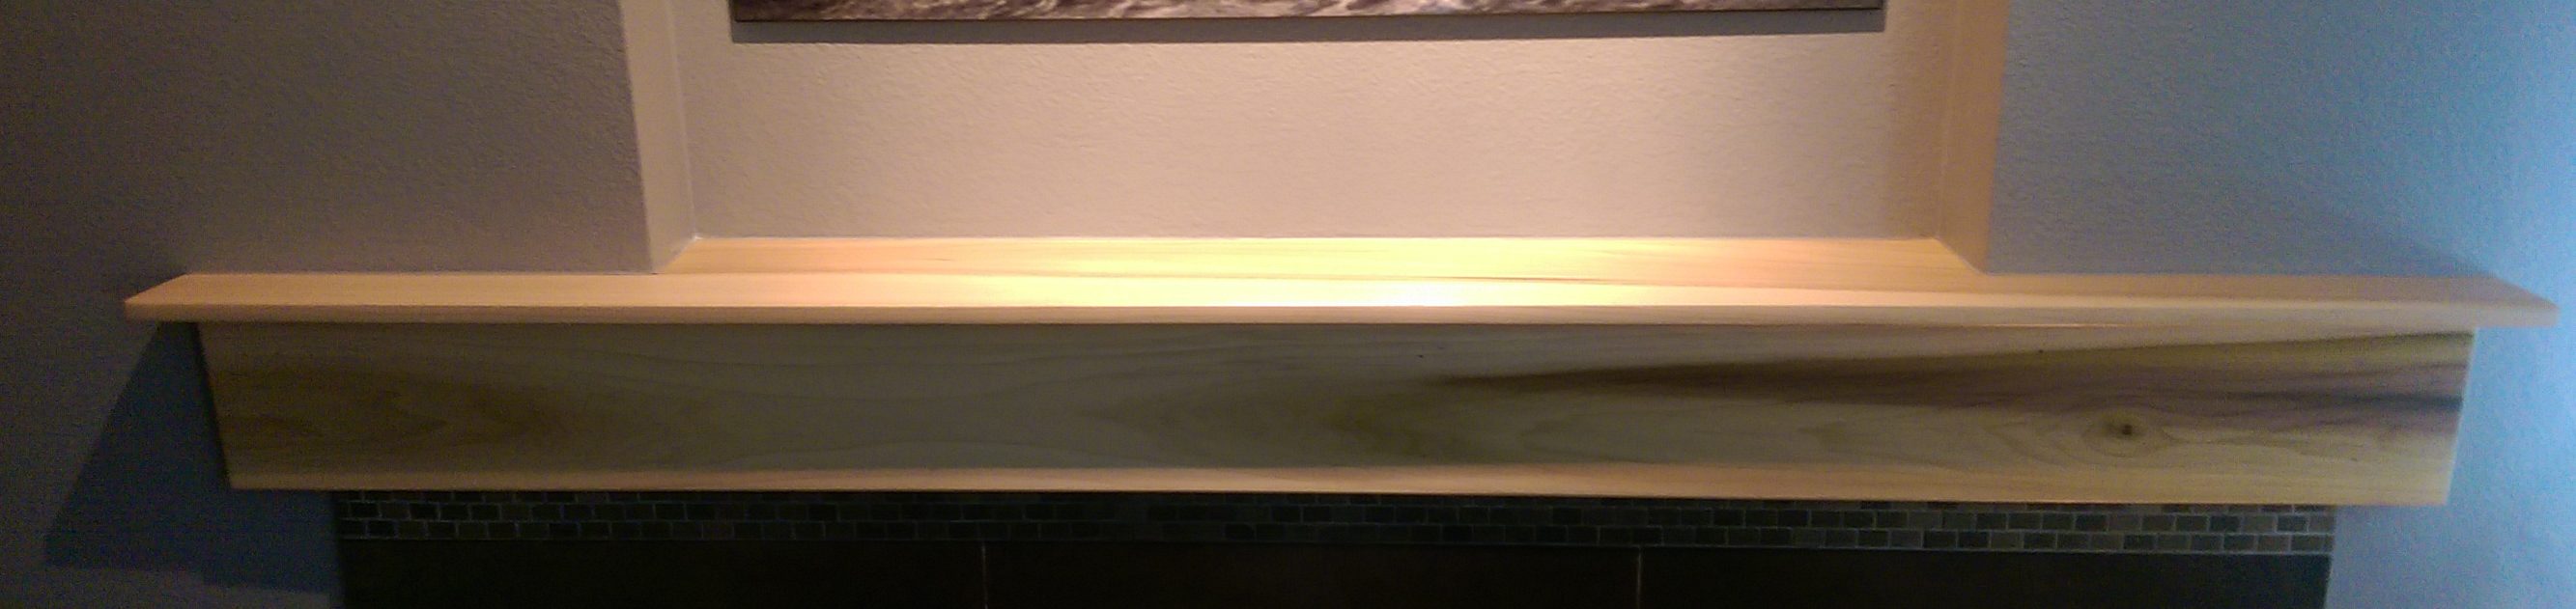
This is the new antenna before being raised. The new PVC is painted brown.


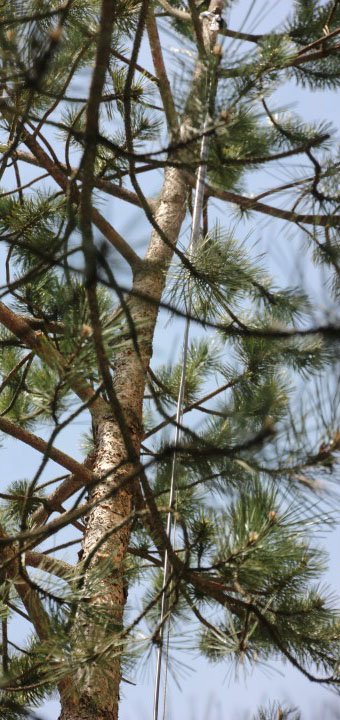
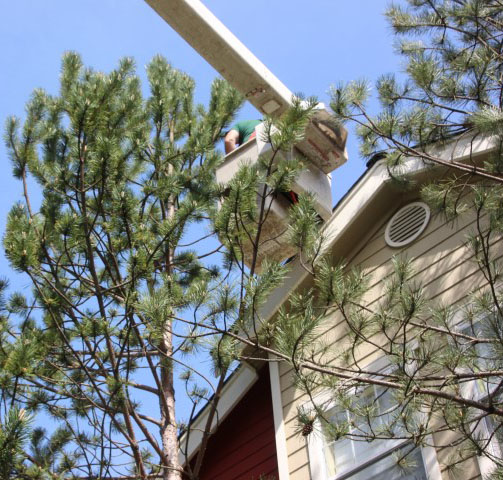
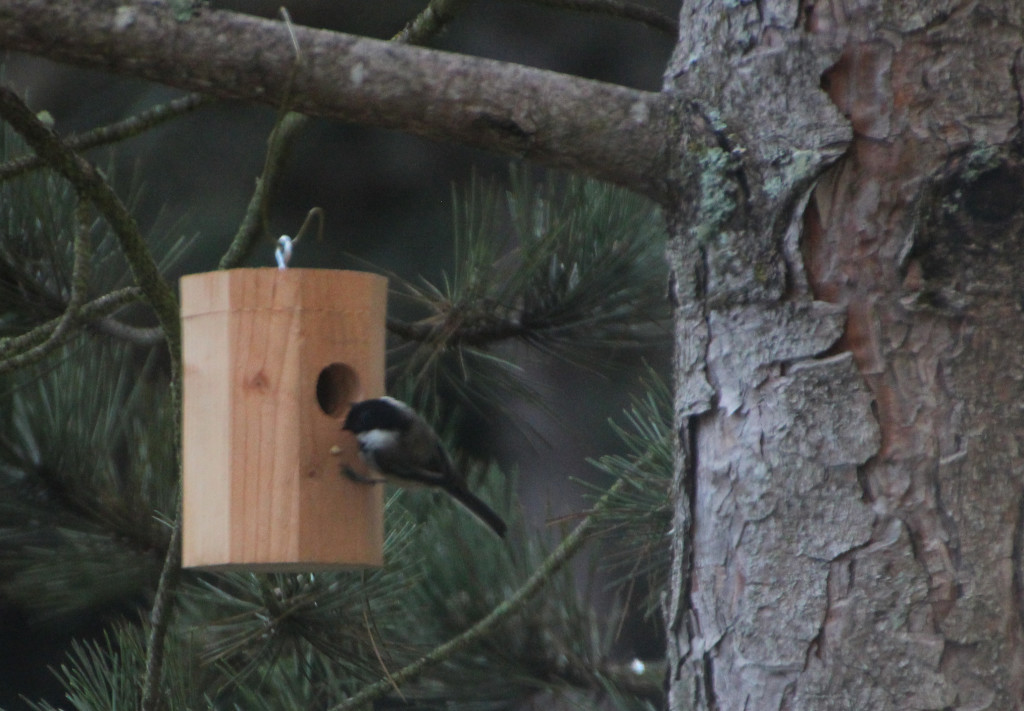
Here is the new antenna is the tree. The coax wire is more visible than the antenna.


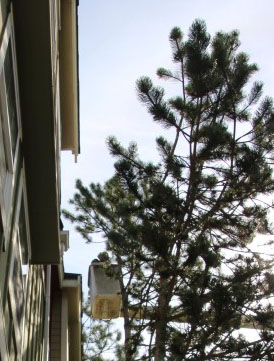
Here is the view from about 25 feet away. Would you notice the antenna if you weren’t looking for it? (Notice, the tree ion the right is now gone.

As soon as the antenna was up, I tested it. No noise and a clear signal to the repeater!  OMG! It’s wonderful! I haven’t even tried out the new, more powerful radio yet. I’m still using a handheld radio connected to this outside antenna. The new radio will have other benefits, and I will use the handheld for portable and emergency work. It should even work with the new radio to allow me to relay from my deck to the repeater, while I enjoy the nice weather we’ll be having someday.

Now that I can stop worrying about whether I can connect with other hams, it’s time to start studying for a license upgrade!

More Ham Radio

I have discovered that amateur radio is an adventure in itself. I’ve continued my quest to get an antenna set up, and I’m working on a pitch to the HOA to allow me some latitude in the placement. Ham radio, like practicing law, has a very broad spectrum of activities one can choose from. In law, you can practice Family Law, Corporate Acquisitions and Mergers, Intellectual Property, Personal Injury, Estate Planning or many other paths, all of which are very different, but still have things in common. In ham radio, you can pursue emergency preparedness, use of the radio on hiking or other adventures, travel centered around radio contacts, or just making friends on the air. One group of enthusiasts does Summits On The Air, hiking to peaks where they set up a portable station and try to make contacts with “chasers” from there. Another group does Islands On The Air, and last year during the National Park Service’s 100th anniversary, they set up National Parks On The Air, attempting to broadcast from every national park. Contacts were made from all but about 30 national parks and monuments in the U.S. during the year.

Some people really don’t even talk on the radio much—they are more interested in building and designing things and getting them to work. This won’t come as a surprise, but I am particularly interested in learning about the use of computers with radios, and even in that, there are many avenues. I am also very interested in getting involved in community emergency preparedness. All of these things involve a radio, but they are very different facets of the hobby. I’m just a beginner, so I have a long way to go to even start looking at more esoteric aspects of the hobby, but there are many podcasts, YouTube videos and publications to help. This hobby is one of the things that has been keeping me busy in retirement.

I recently made contact on the air and by email with my local emergency management group, so I will be following up on that in the near future.

Woodworking – The New Mantel

I am pretty well finished with our new mantel. It’s kind of embarrassing that it’s taken more than a year to cut, sand and finish two boards. (My friend Stitch Billings installed a zero-clearance fireplace and built a complete fireplace enclosure and mantel in a week or two, and he has 4 little kids hanging around!) I have some excuses: My shop is 20 miles away; I needed a power tool that I had to borrow from a tool library and they were either checked out much of the time or not functioning correctly; Janie had some injuries during that time and we had summer travel and the holidays. In addition, before I even got started, I taught myself how to use Google Sketchup (learning how to use Sketchup was part of the adventure) and developed a more elaborate design. Eventually I was able to visualize a much simpler design. In the end, I think it looks pretty good, if I do say so myself.


The top piece is clamped to the old mantle and glued with liquid nails.

The face piece is ready to go. Janie helped me pick out this wood, although it was for another project. When I decided not to do the other project, she suggested that we use if for a mantel. I didn’t know when I got this wood (poplar) that it can be very hard to finish. Due to the variations in hardness, it can turn out blotchy. I used some sealer before applying the finish, and it also may have helped that I was using a clear finish instead of stain.

 My first attempt to attach the face with liquid nails and held in place with just tape did not work. I had to remove it and reinstall it with the liquid nails and some brads.

 The final result

Ham Radio

Warning! The may be of interest only to geeks.

During December, with everything else going on, I attended a two-Saturday class to prepare for my amateur (ham) radio license. At the end of the class, we could take the test, and I passed to get my Technician Class license. I was briefly KI7JJK, but I changed it to K7RCH. This is the entry level, but it gives me quite a few privileges. In the old days, the entry level was the Novice Class, and I actually held this license about 50 years ago when I was in high school. At that time, all levels of licenses except Technician required morse code. I was able to pass the Novice code test, but the Novice license was only good for 1 year and I never got my speed up enough to pass the next level, so the license lapsed. (Although the Technician license did  not require code even then, it was aimed at experimenters and was much more limited it its usefulness than it is now.)

I originally decided to pursue the ham license for emergency preparedness purposes. Obviously, radio is no longer needed in most circumstances for long-distance communications. However, my community of Kenmore has a horrible record for power outages. When the power goes out, the computer is worthless, the internet is inaccessable and cell phone communications follow soon after. (Even if I have plenty of backup batteries, the cell tower backup batteries fail after a few hours.) While attending an emergency preparedness seminar a few months back, I learned that basic ham radios are no longer very expensive and could be a way of communicating when cell phones are not available. Given Janie’s experiences of the last few years, I do not want to be without a means of communication. Besides, they keep predicting that “The Big One” will happen sooner or later, and ham operators have been a key part of emergency communications for more 100 years. Since I had once had a ham license, and I am a certified geek, I thought “Why not?”

After passing the test, I needed to get set up. This has proven to be more challenging than I expected, although the technical challenge is part of the appeal to me. Jess got me a handheld ham radio for Christmas. Janie got me a Ham Radio for Dummies book, and I have gotten other books as well.

I realized that I really couldn’t reach anyone from my condo with the low-power transmitter and stock antenna. So now I am on a quest for improving my signal. This can be challenging in a condo or any apartment building or community with restrictive covenants, because there are limits on putting up antennas. I have gone from getting a bigger portable antenna, to hanging a full size antenna in my den, to placing a “stealth” antenna outside. Can you see the antenna in either of these pictures?

IMG_8997IMG_8998a

I could get a more powerful radio, but the antenna is actually as important, and I think it’s better to use my low power to confirm that I’m improving my signal before going to a more powerful radio. I’m still working on all that. Fortunately, hams are incredibly generous in offering to help newbies, and I plan to go to some get-togethers and get advice from more experienced hams.

In studying for my license and reading up on ham radio in general, I learned that the hobby has evolved in the last 50 years. First, the bands available to the Technician Class license are in more general use, so it is easier to communicate with people. Secondly, there is a great deal of crossover between computers and ham radio now. Ham radio can be used over the internet for long distance communications that would not be available with the radio alone. For example, I might get a radio link to an area that still has power and then piggy back onto the internet to get the signal to another part of the country. It is even possible to call someone with a telephone at the other end using a radio at my end. Also, computers can be used to control radios, improve the readability of transmissions and replace expensive test gear. I’m very interested in learning about these new technologies.

Although I got into ham radio this time for emergency purposes, I am excited about pursuing it as (yet another) hobby. It relates to computers, but it also has similarities to woodworking in that hams like to build things. (Hams actually developed the technology that led to cell phones.)


For Geeks Only

This post is probably only of interest to geeks, both music and computer.

As those in my family can attest, I am not an Apple guy. (I like to eat them though.) Still, a few years ago when I moved to a condo and no longer had room for my CD collection and stereo, I got an older iPod and transferred all of my music to it.  I had to use iTunes to sync it with my PC.  (A lot of people complain about iTunes, but I actually don’t think it’s that bad.) I have more than 5000 tracks in iTunes, and I painstakingly categorized my music to set up playlists for them.  As I started using a smart phone that had enough memory, I transferred my music from the iPod to my phone so that I only had one device to carry.  The problem is that since I use an android phone (and earlier a Windows phone) I had no way to sync my playlists between my phone’s music player and iTunes.  It would be extremely cumbersome to have to set up the playlists in my music players.

Apple Music LogoUnfortunately, there is no iTunes for the android phone.  Recently though, Apple came out with an Apple Music app for android.  I decided to subscribe to Apple Music, but once again, my playlists did not sync between iTunes on the PC and Apple Music on the phone.  I started exploring on Google to find ways to accomplish the syncing.  I finally found a suggestion to install iCloud on the PC and sync iTunes to the iCloud.  (Note: Apple and Microsoft are not much different from each other—they both force you deeper into their ecosystems.) Supposedly, this would allow Apple Music to pick up the playlists from iTunes.  I installed iCloud, but I discovered that I cannot access iCloud without first registering it on an Apple device.  I’m going to all this trouble because I don’t have any Apple devices!

Checking again with Google, I discovered that there is a beta version of iCloud that works with the PC and does not require registration through an Apple device.  I was able to set up iCloud on the PC so that I could sync iTunes from the PC to iCloud.  I checked Apple Music on my phone but I still did not see my playlists.  I reinstalled Apple Music and there they were!  I now have access to my playlists.  I don’t know if it was a coincidence that they appeared after I reinstalled Apple Music, or whether it just took a while for the syncing to be accomplished.

Lucky Jess!  As I mentioned, we’re going on a road trip next week.  He will have access to listen to all of my Irish and Celtic music!

How Not to Save Your Valuable Files

crashThis may be interesting only to those of you who believe in backing up your files. I am obsessed with it, but I have never found the ideal solution.

I have over 32,000 photos and short video clips. I have two automatic backup systems on my desktop. One is a local program, ShadowProtect, which periodically and automatically creates an image of my computer on an external hard drive (for the technically minded, this is a NAS). The other is CrashPlan, which automatically backs up my files to the cloud.

The other day, I had the brilliant idea to move my photos and videos to an external hard drive to make room on my desktop’s hard drive. Step one, all I copied the files to the hard drive (NAS-different from the one opn which I store my backups). Step two, I verified that the pictures were actually there. Step three, after confirming that the files had been moved successfully, I deleted all the files from my desktop. Voila! More space!

Here is the problem. Neither one of my back up systems backs up network drives like my two external hard drives. The problem with the external drives in my den is that if we had a fire or theft, those drives could be inaccessible. Backing my data up to the cloud meant that I could still get my files back. I just moved 32,000 files to a device that is not backed up at all! All that had to happen was for that one drive to fail, and I would have lost everything! As a stop gap measure, I am copying the photos and videos to my second external hard drive. That solves the problem of a single drive failure, but not the problem that I don’t have an off-site backup. There are work arounds for getting CrashPlan to back up a network drive, but that will take some additional work, and in the meantime, I didn’t want to risk a drive failure.

By the way, if you don’t back up now, there are versions of CrashPlan that are free and better versions that are inexpensive. All work automatically in the background. There is no excuse not to back up. If you have a laptop, you are especially at risk for losing all your valuable information.

Follow up: The work around for backing up a network drive using CrashPlan is somewhat arcane, difficult to set up the first time, unless you are an experienced geek. I got it to work with some instructions I found on a web forum. I am not sure how reliable it is, so I will have to monitor it. If you have lots of photos or other precious date filling up your hard drive, I recommend getting a second internal drive, which CrashPlan can handle easily.

Sarah’s Castle Update

Sarahs Castle Grade
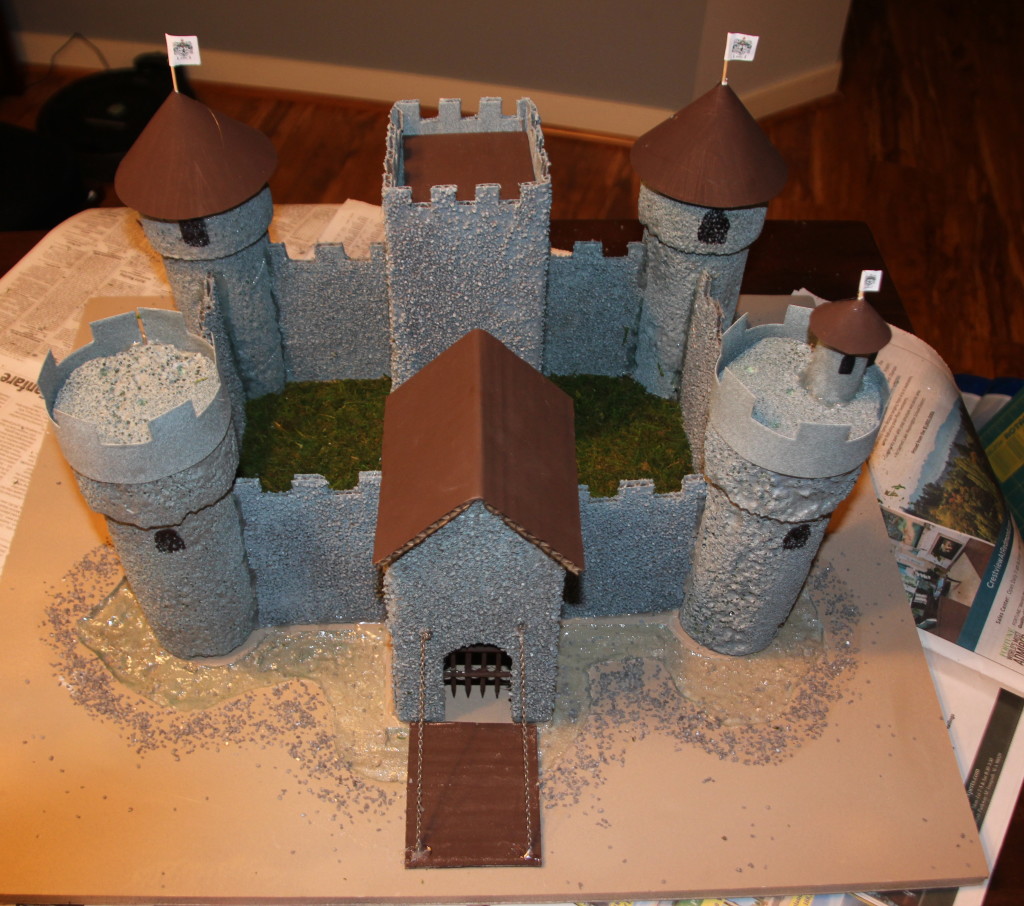
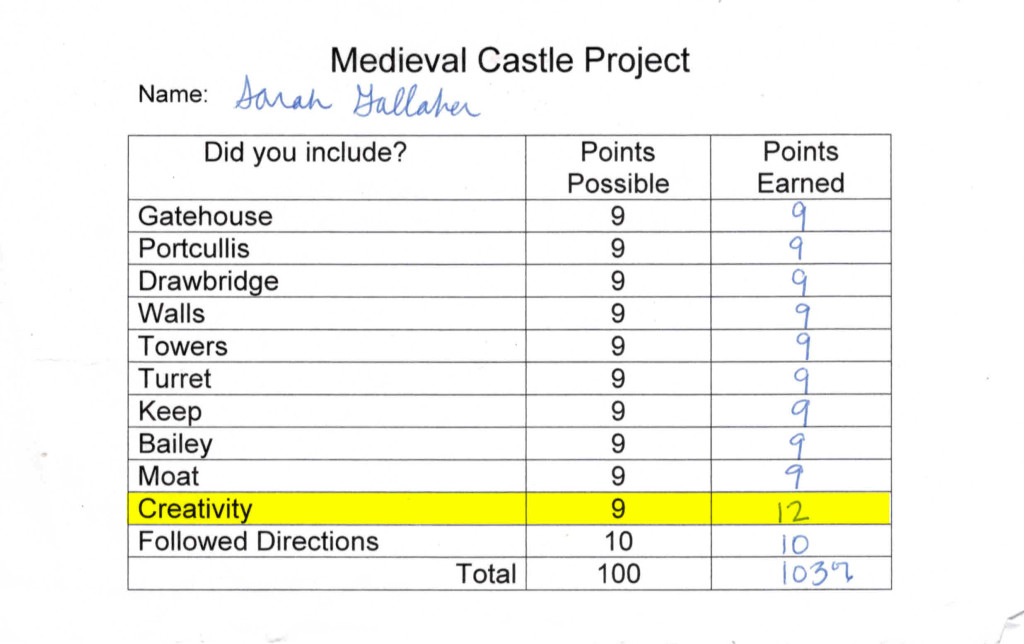
Sarah got the grade for her castle project, and she got more than the maximum points. Note that she got extra credit for creativity, and in spite of my help on the project, the creativity part was all her with a few ideas from Janie.

Sarah’s Castle

I haven’t been too diligent about updating my blog recently. Partly it’s because I’ve been busy—working a few days, walking greyhounds at a local shelter for exercise, and miscellaneous other things. One of my activities was building a castle with our youngest granddaughter, Sarah.

Each year, the girls’ school has a formal “Coronation” ceremony for 6th graders that is similar to Catholic Confirmation. The students dress up in medieval costumes and are dedicated to Christ.

2014-05-23 Katie-Emma
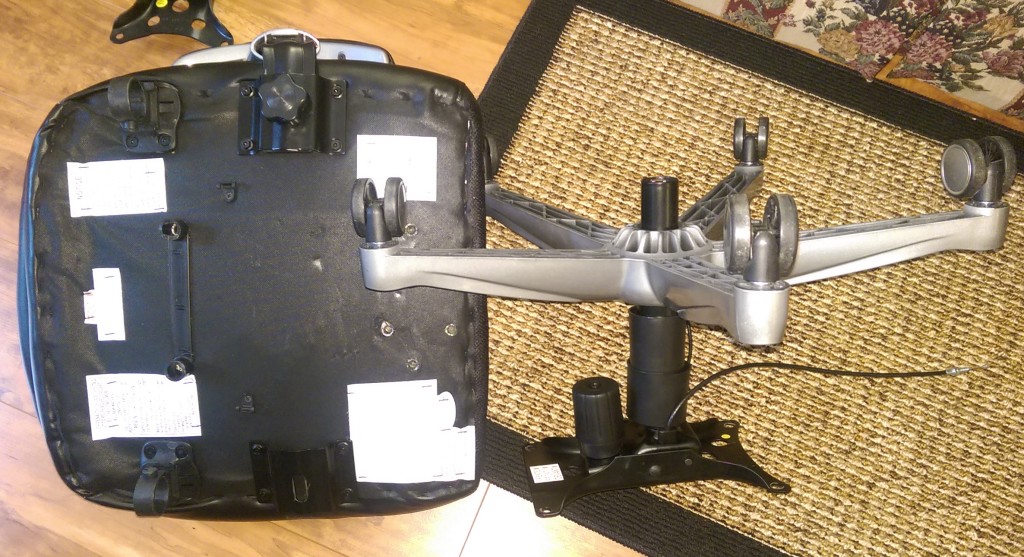
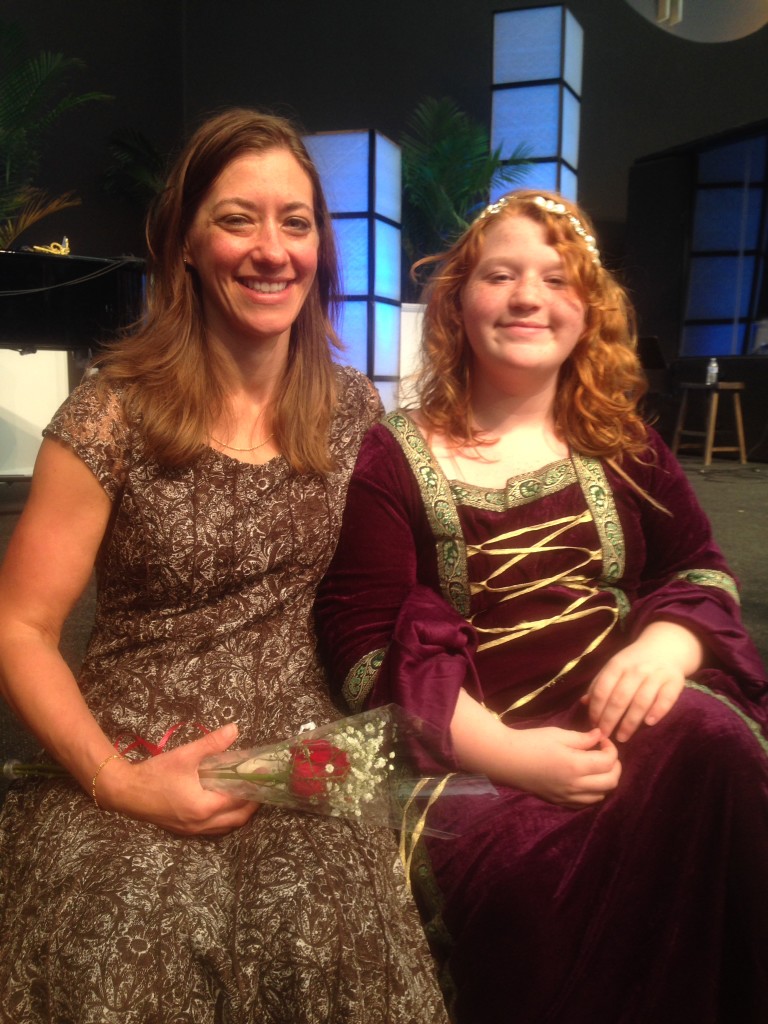
Sarah’s hasn’t taken place yet, but here is Emma 2 years ago. Janie and I contributed Sarah’s dress (as we had for Emma), and Janie altered it to fit.


Along with the Coronation, they have a program integrated with the 6th grade history classes. While they are studying medieval history, they also build a castle in a traditional design. In the process, they learn the parts of a traditional castle, and create a model. I helped Sarah build the castle. It was a big project! Sarah is imaginative and meticulous, so she had some very creative design ideas. Unfortunately, I did not think to start taking pictures of the process until reminded by my friend Roger. I was able to capture part of the process before we finished the project though.

IMG_7648

IMG_7655
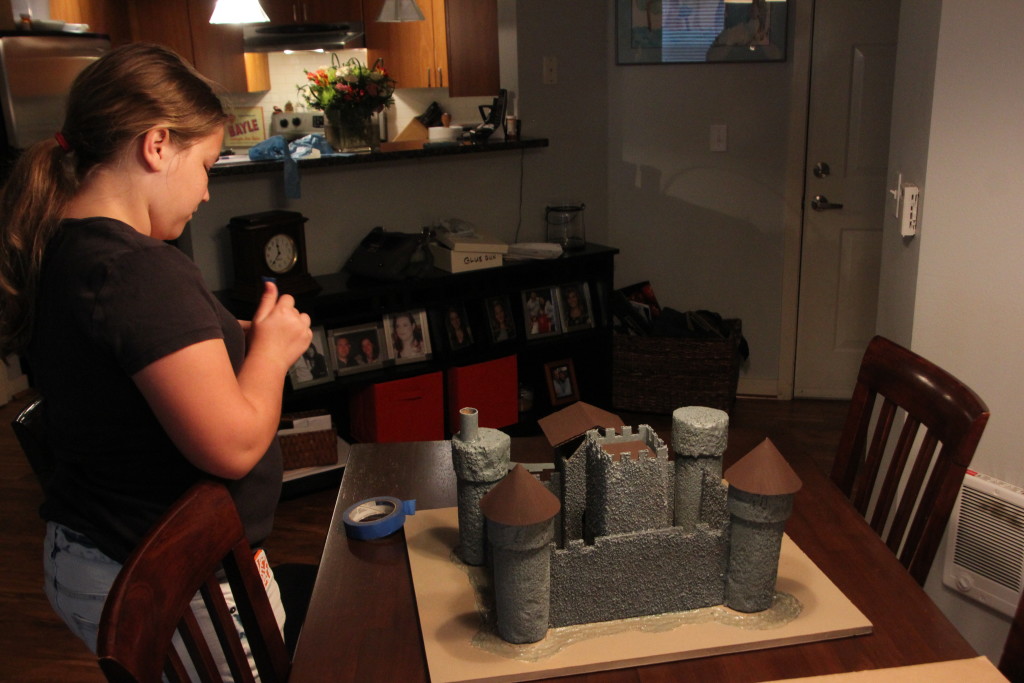
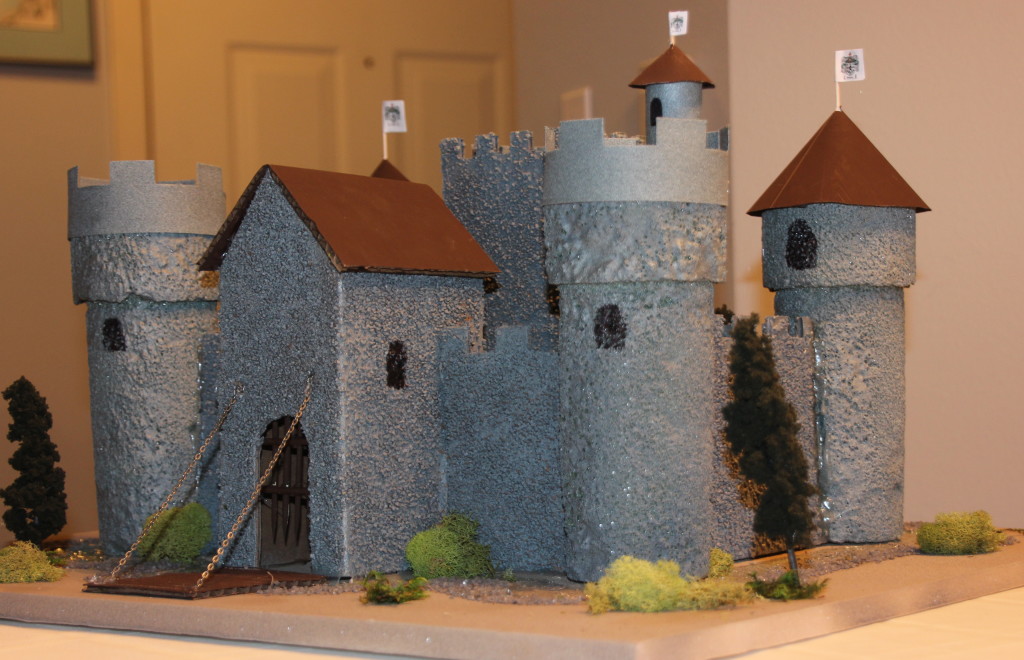
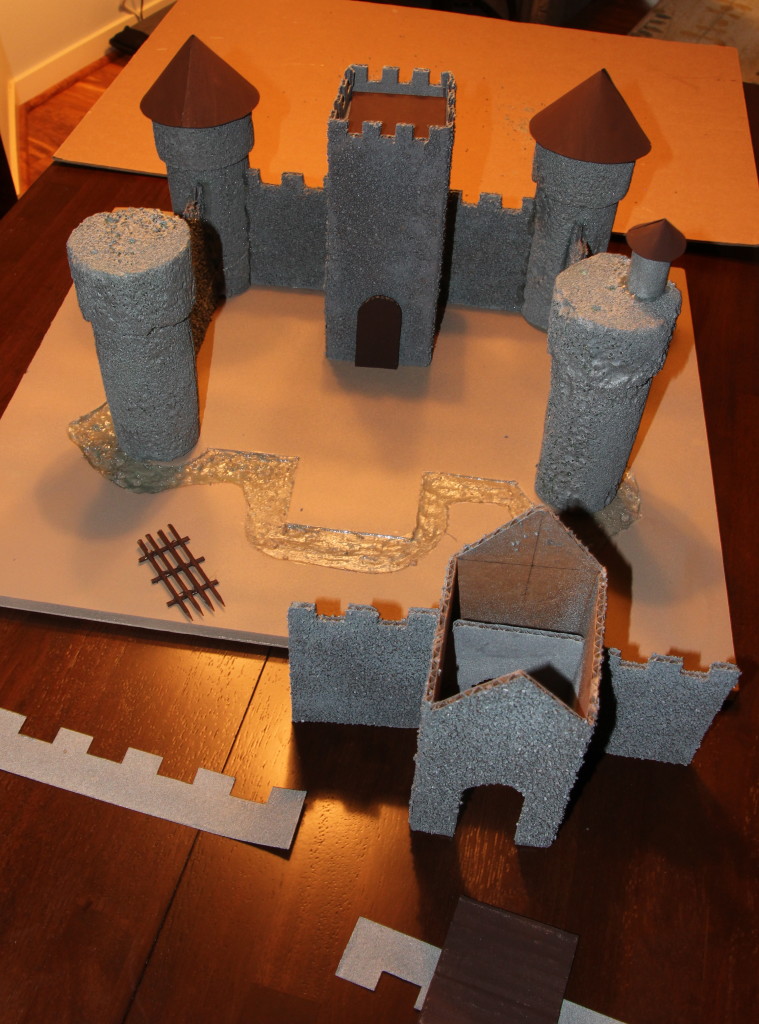
Here is the partially constructed castle, with the front wall and gatehouse not yet in place. The castle is not yet attached to the base. The gatehouse roof and the battlements for the two front towers have not been installed. The grid-looking thing is the portcullis, You can also see the moat that Sarah designed.


IMG_7698

This is a closeup of one of the towers with the battlements added. Sarah came up with the idea carving the moat out of the foam board base. After the moat was carved out, she painted the entire base with a textured brown paint to look like soil,Then she filled the moat with a clear blue glue she had found to create the appearance of water.  The towers are styrofoam painted with a textured grey paint to give the appearance of stone. She also added some of the gravel around the edge of the moat.


The styrofoam towers didn’t need any extra texture, but since Sarah used corregated cardboard for the walls, she wanted to add texture to them. Janie spotted some tiny grey gravel at the craft store and Sarah decided to use Modge Podge to add it to the walls. Here are two shots of the nearly finished castle showing how the texture of the walls blended with the towers.

IMG_7692

The roofs of the rear towers and the gatehouse have been added with flags, A drawbridge is in place and the portcullis has been mounted in the gatehouse door.


IMG_7694
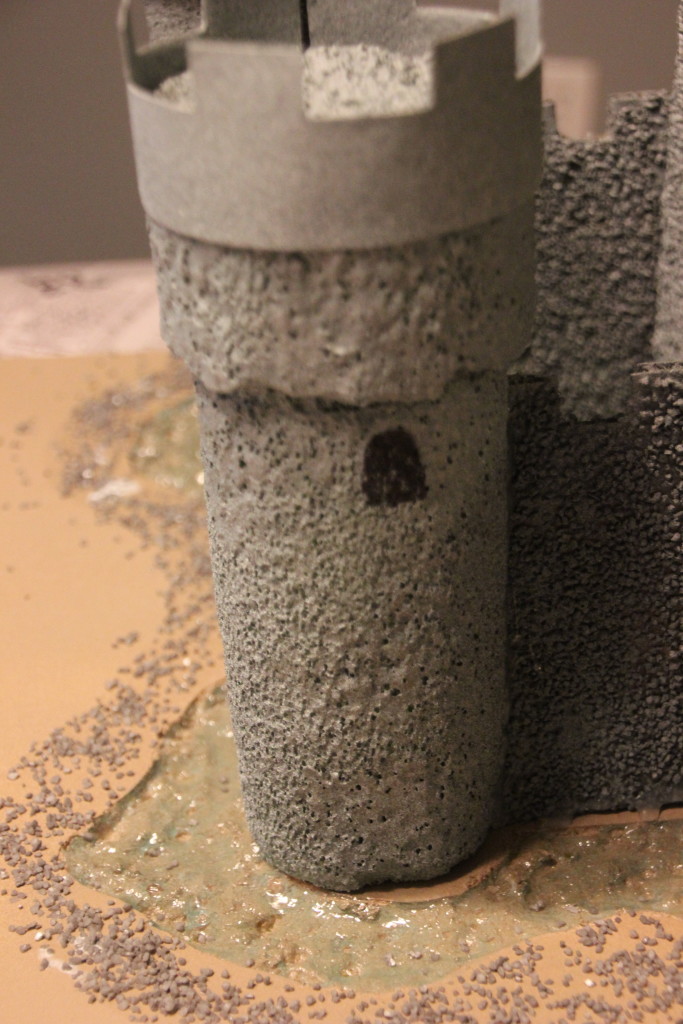
Inside the bailey (courtyard) Sarah has added grass.


IMG_7715

Also inside the bailey, she added some shrubs. The grass and shrubs were made of 2 kinds of moss that she found at the craft store.


IMG_7722

The flags on top of the castle are tiny, but she managed to put the Gallaher coat of arms on them!


And here is the finished castle! The final touch was adding trees and shrubs around the outside. I was very proud of Sarah for her imagination and dedication. Although I helped, primarily with measuring and hot gluing, she did the design work, searched out the supplies with us at the craft store, drew and cut out the pieces and did the painting.IMG_7704


Chickadees

This is something of an experiment. If it works, the post will automatically show up on Facebook. I have to try it to see if it will work.

For those who have followed this blog, you may have seen that I made a “hummingbird” house a couple of months ago. Then I found out that this isn’t the kind of house that hummingbirds use. I decided to leave it in place to see if anyone else was interested. Last week, Janie noticed that some chickadees were checking it out, but the hole was too small. It looked like they were trying to enlarge it. After they had tried for a few days, I took the house down from the tree. I could see where they had been working on the the hole, but they hadn’t made a lot of progress.

IMG_7519

I took the house to the shop and enlarged the hole. I still wasn’t sure if it was large enough, but today the chickadees were back. At least they are interested!

IMG_7560a

We’ll see what happens. If this birdhouse doesn’t work out in the next week or two, it may be too late for this season, but I will definitely get something for them for next season.

I am also participating in a 7-day Nature Photo Challenge. This is Day 4, and my potential new tenant is my entry. I was nominated by my cousin Susan Sever, and for this day, I nominate Noel Aguilar to accept the challenge. Post a nature photo every day for 7 days and nominate another person each day to take the challenge.

Back in the Shop


20160123_155640
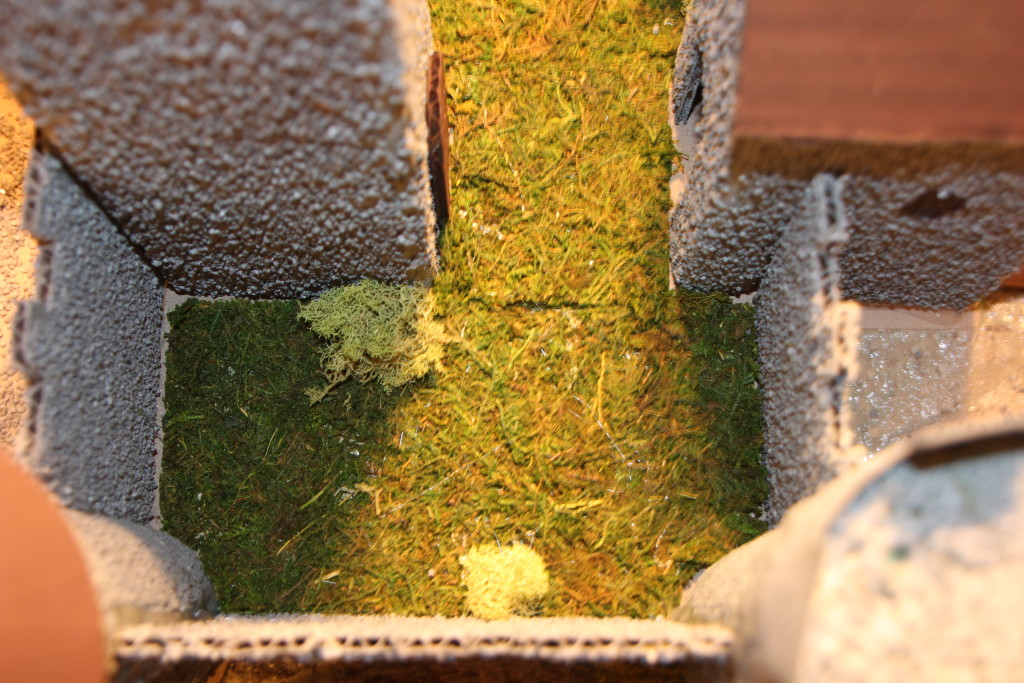
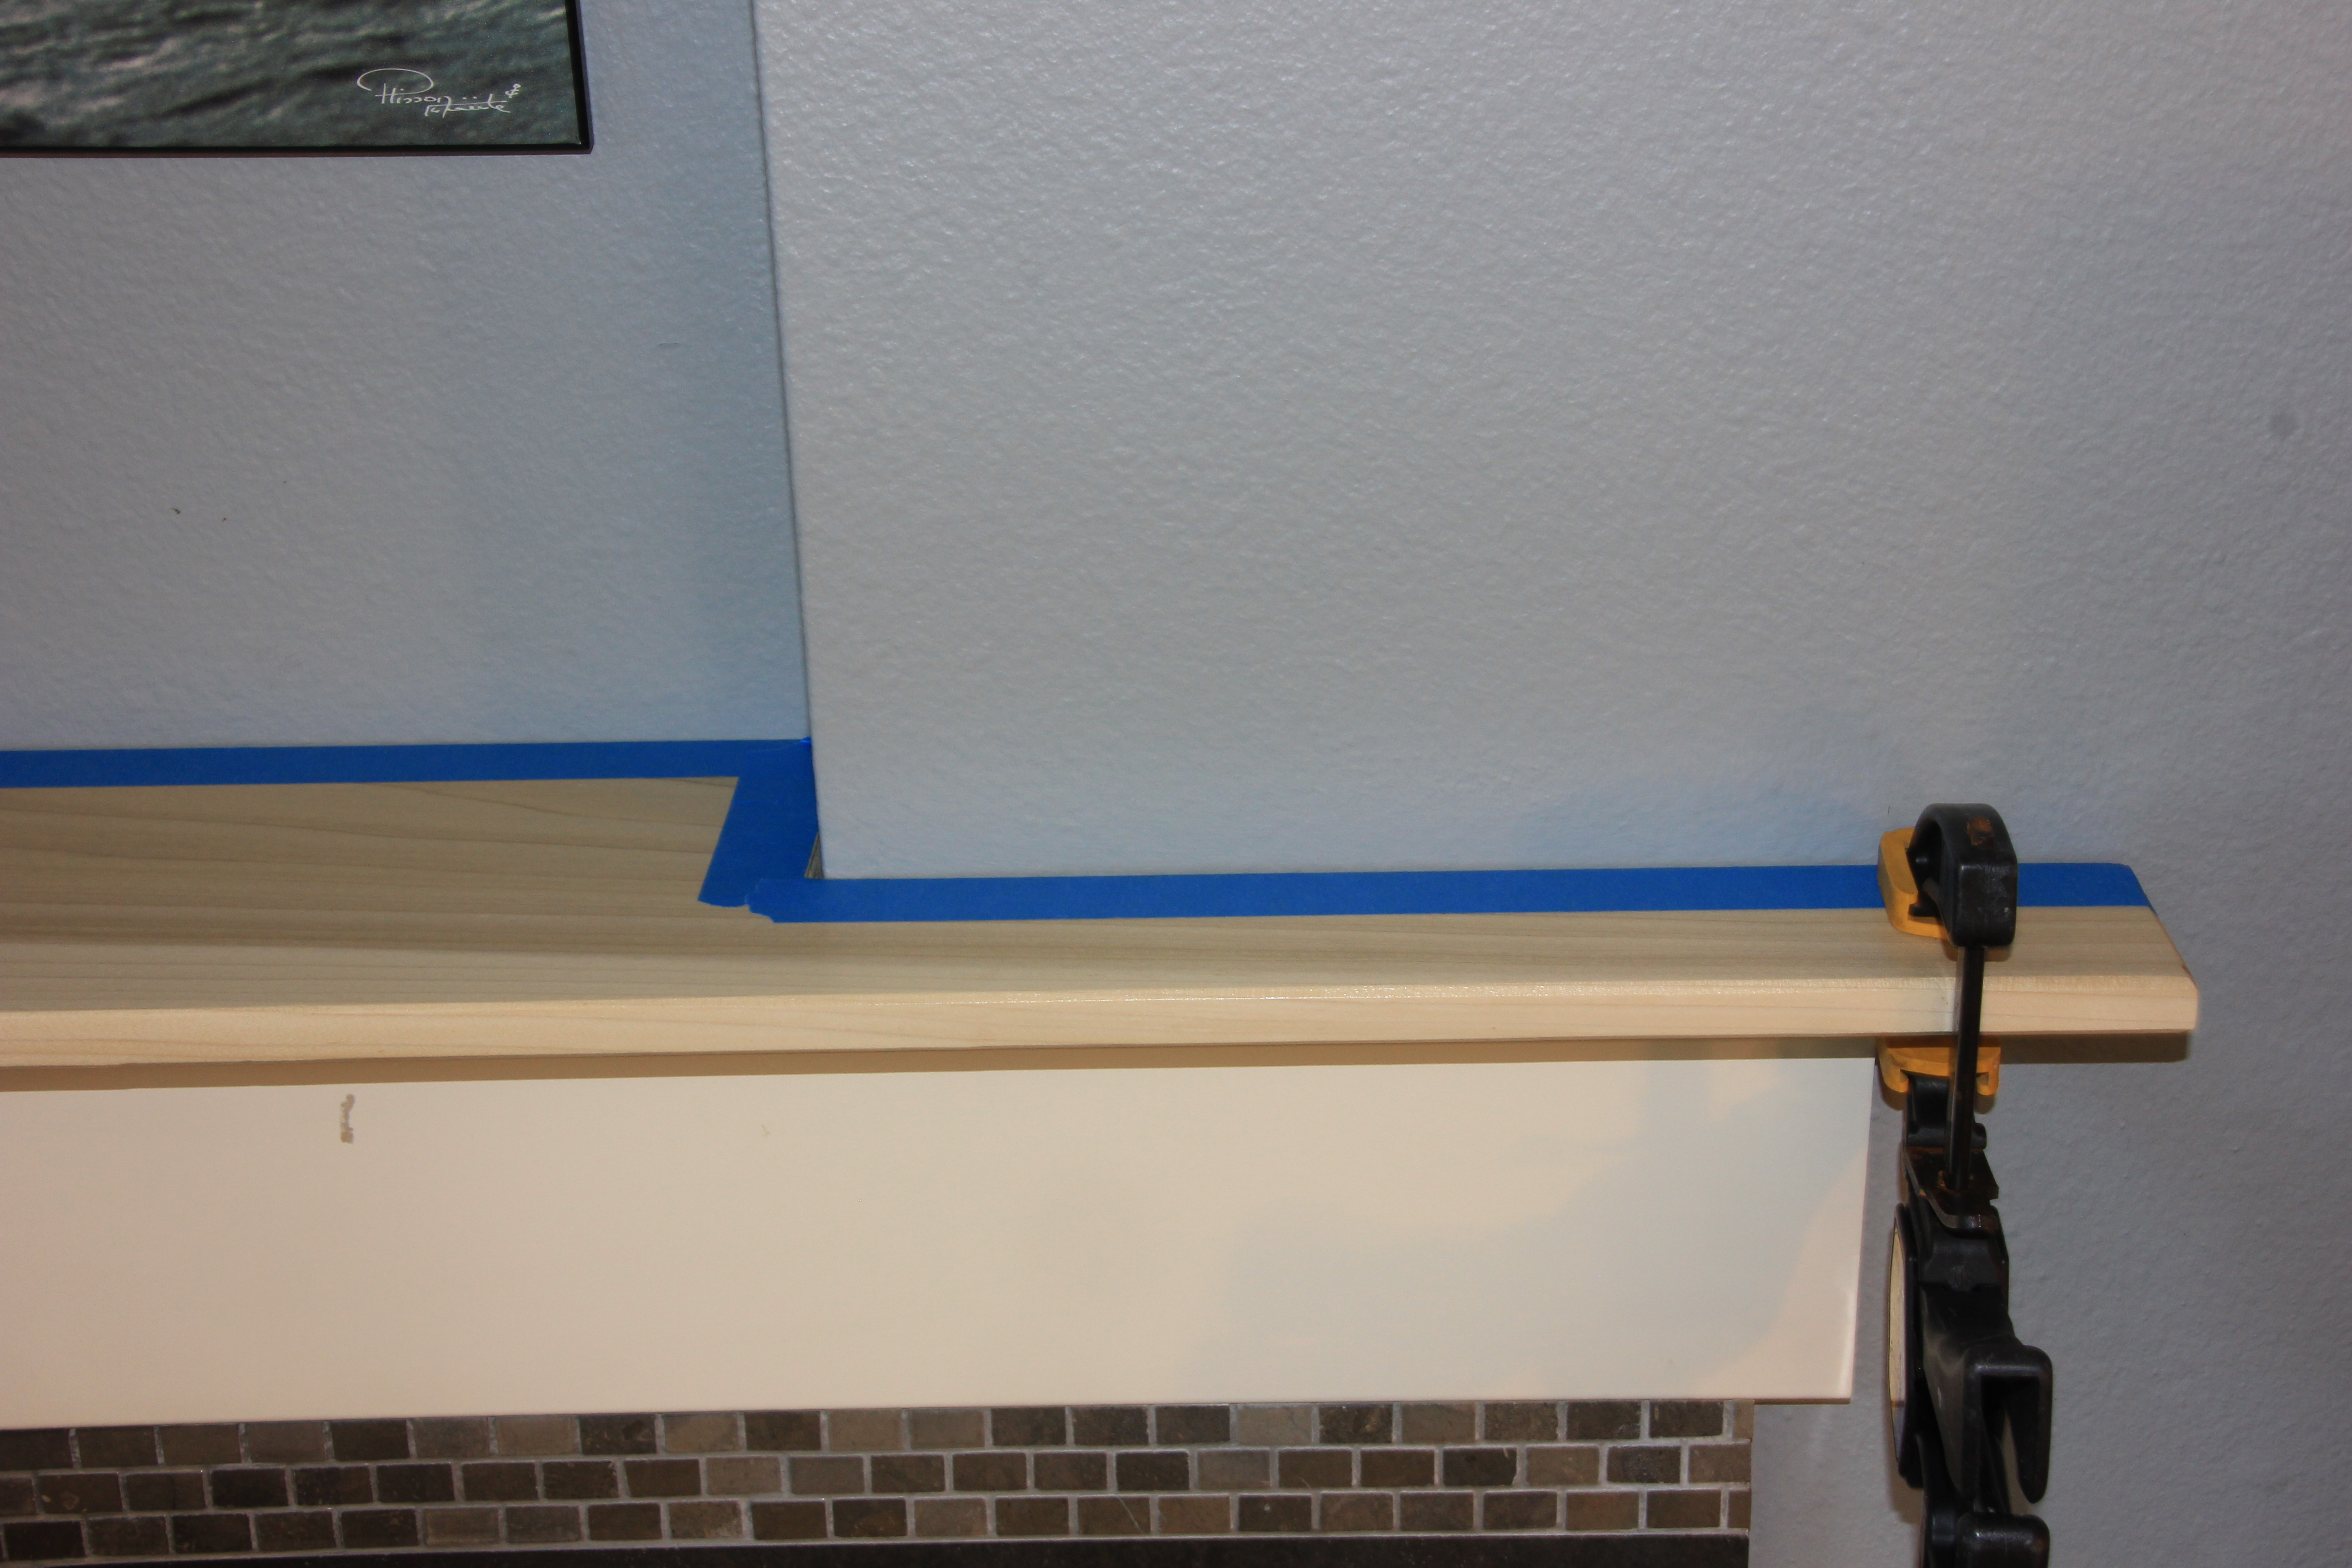
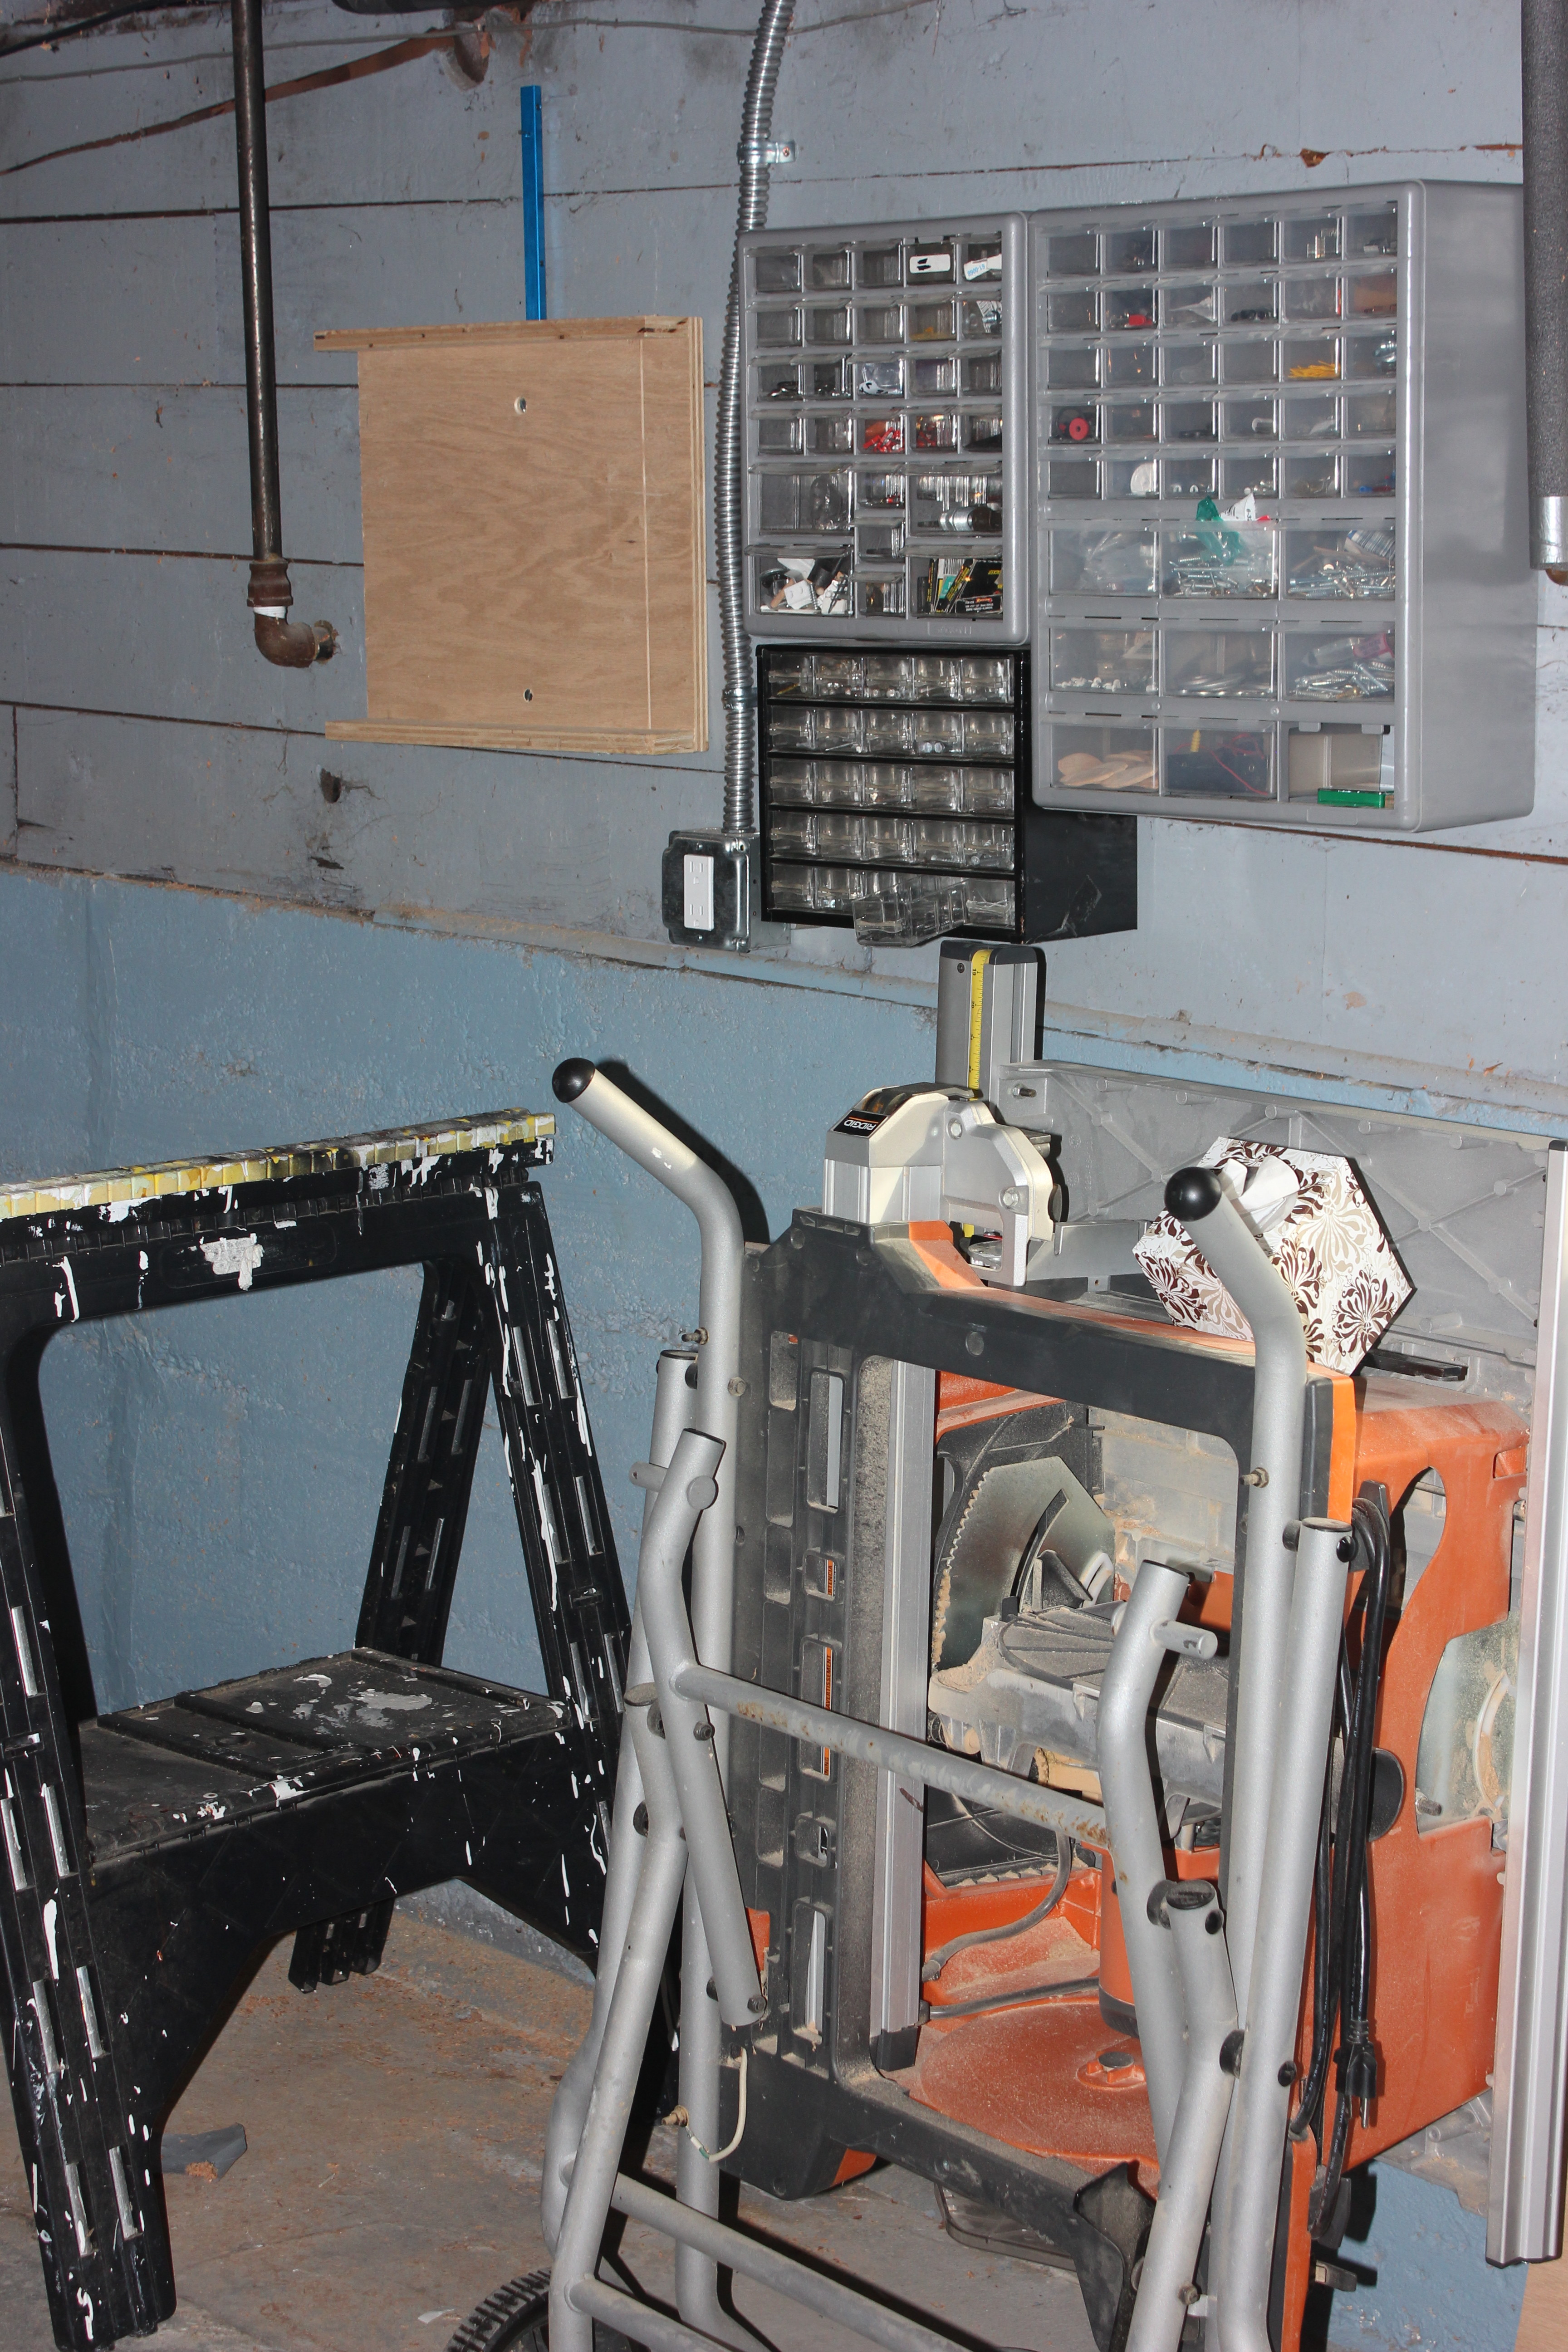
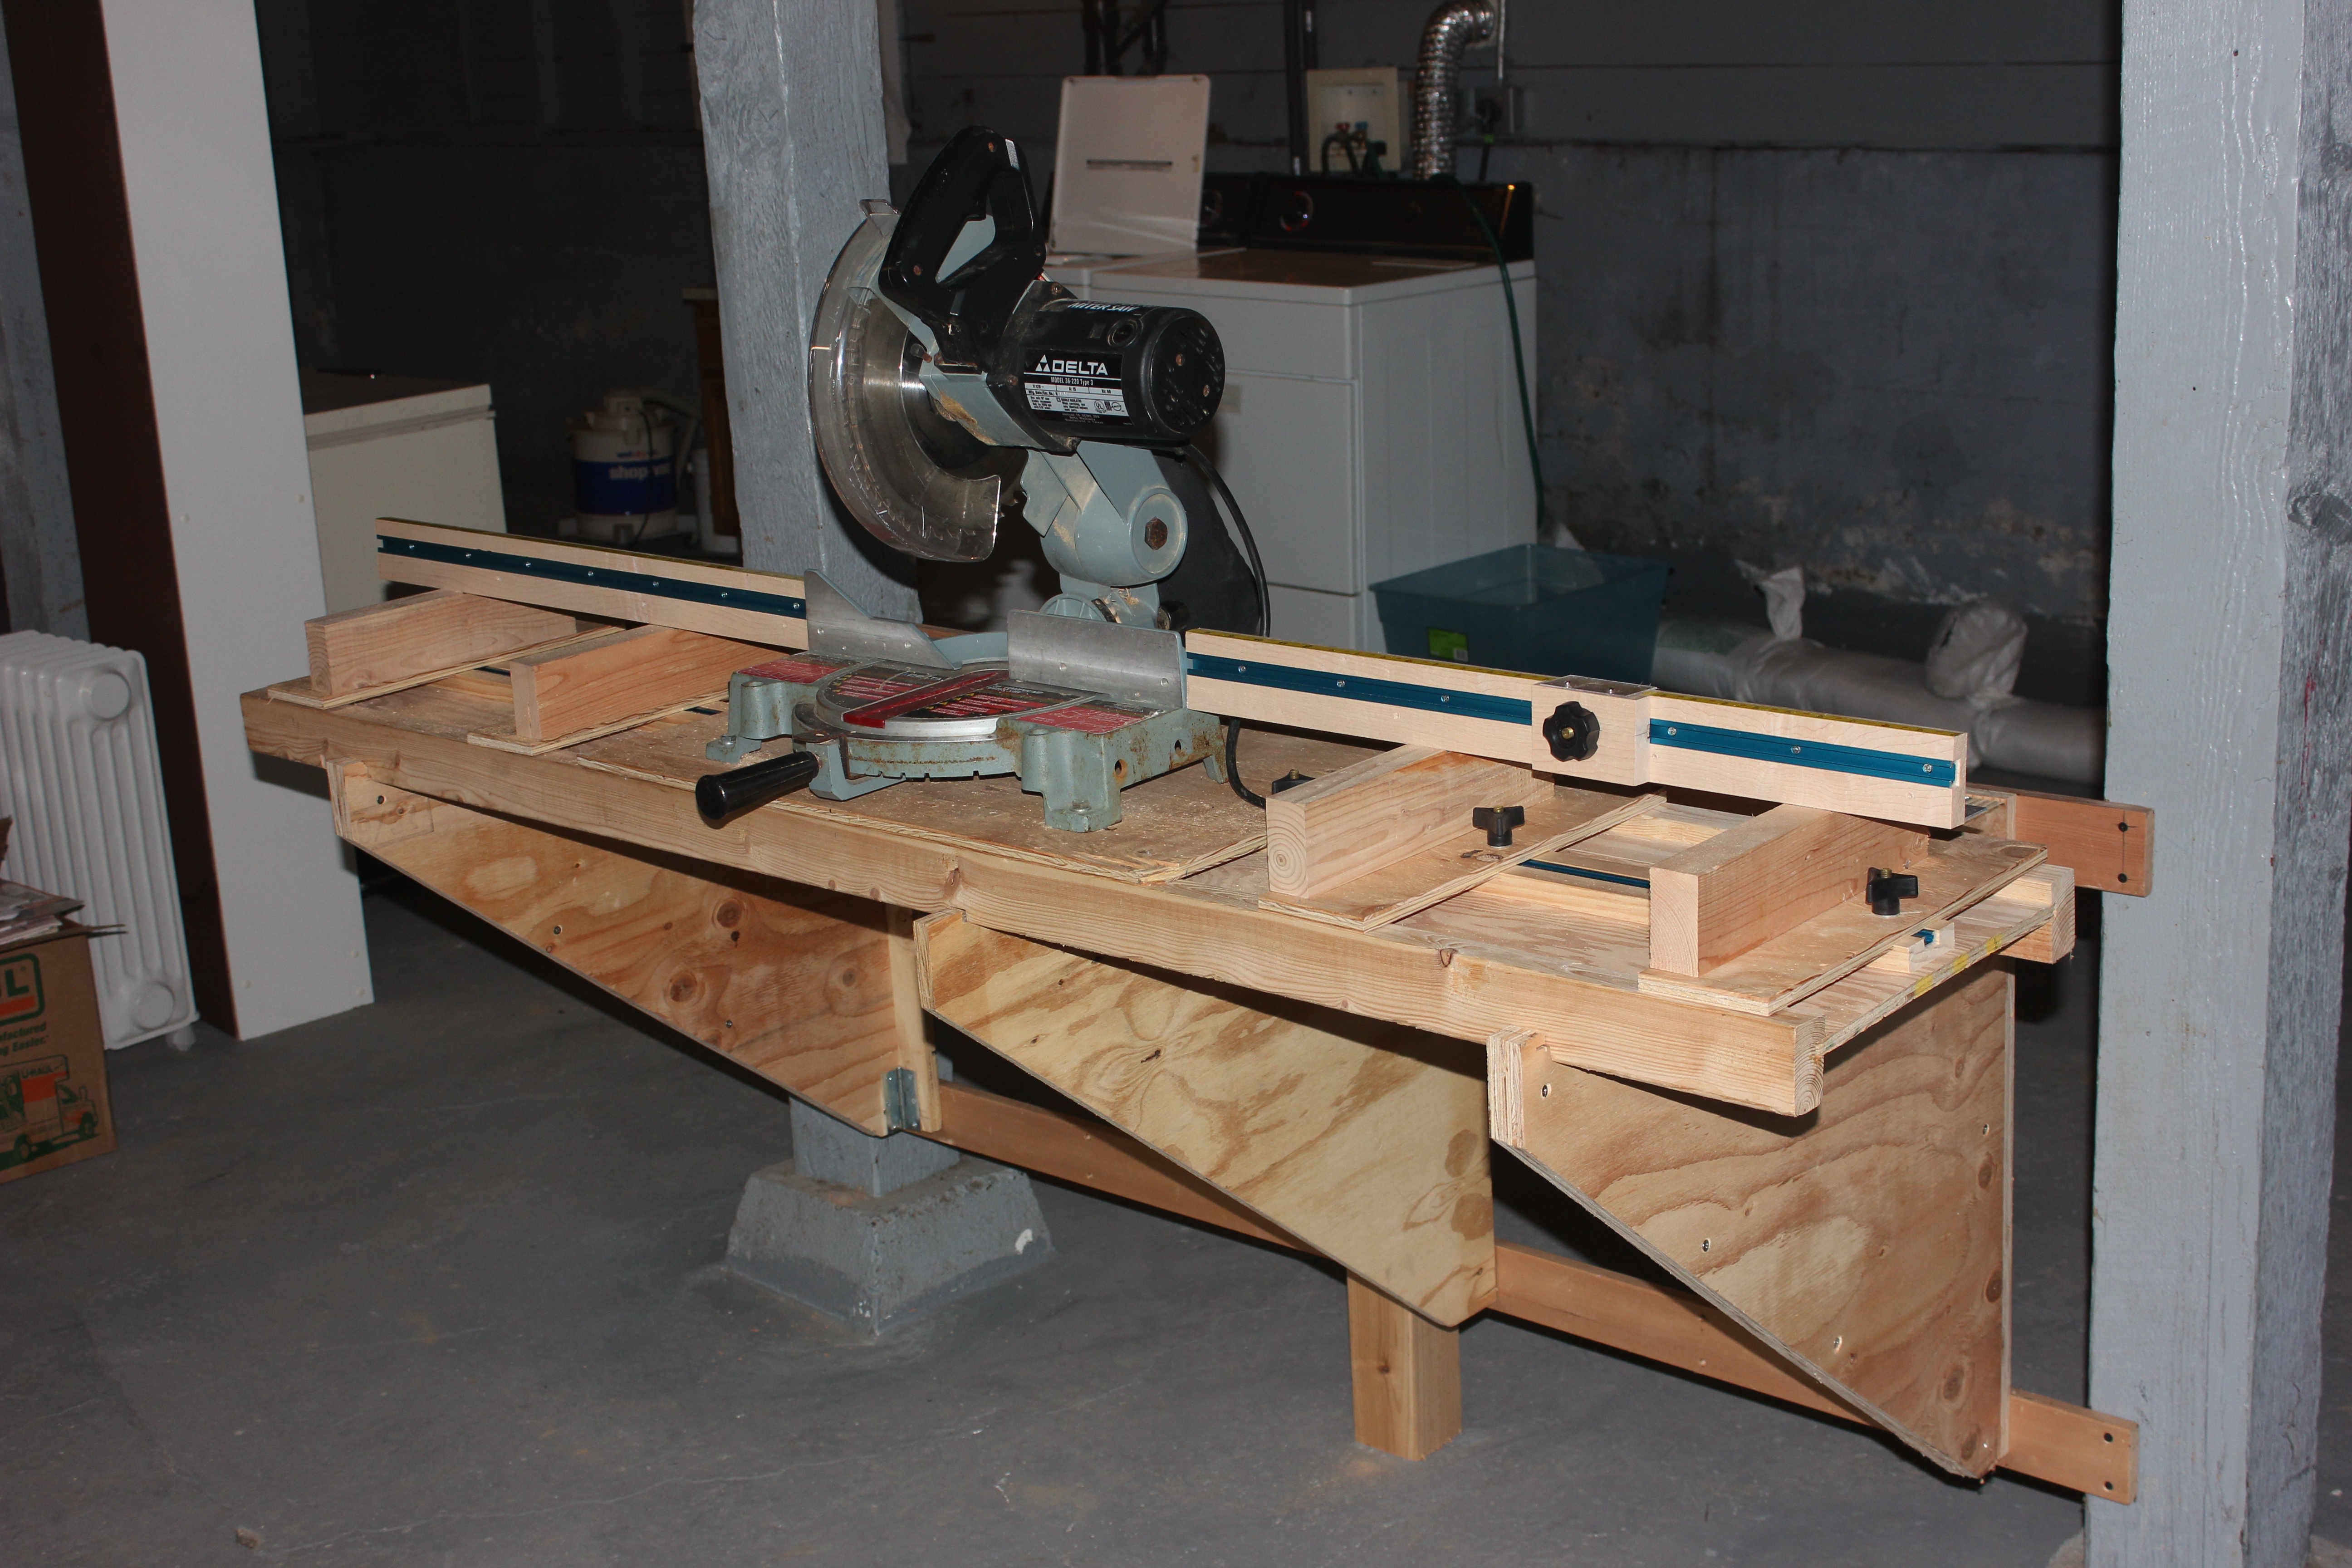
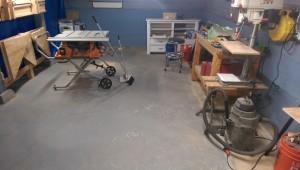
Yesterday, I went to the workshop for the first time since October. I am still working on getting organized and doing shop projects, so today I cut some planks to raise some things up off the floor (which sometimes gets wet) and I made a wall mount to hang my router table off the floor. I also installed a cabinet that had been given to me to use for storing my small power tools.


Life Happens

As most of you know by now, our trip to Australia and New Zealand scheduled for September 28 had to be postponed. Janie had a fall and did some serious damage to her hip and leg 5 days before the trip. She had surgery on September 25 and spent a total of 25 days in the hospital and rehab. She came home Monday! We expect the next several months to be challenging but we are both committed to making progress as quickly as possible.

Our first day home was challenging to begin with because we had to get used to doing things differently from at the skilled nursing center. You don’t realize how complicated simple tasks can be or how much difference an inch or two in furniture height can make until you have to negotiate getting in and out of a wheelchair. And I’m not even the one who has to do it! We also didn’t have all the right equipment at first. It’s amazing how many miscommunications occurred between health care providers along the way. We’ve found already that we are improving quickly in our transfer techniques with practice, and Janie has started home physical and occupational therapy. Her attitude remains upbeat and eager to work, in spite of how much it takes out of her.

Leslie has been a great help, and considering that she is working full time and lives 20 miles away, she is going above and beyond! Our nephew, Pete, has also been quite helpful, and we’ve had offers of help from many others, so thank you all.

We expect that our excursions will be very limited for a while. At this point, Janie has not practiced getting in and out of a car, and she’ll need to build up her strength in order to do it. She’ll need a great deal of help around the house, so thankfully, I am retired and available. As a result, we will not be traveling and I will probably not be doing much in the way of woodworking or taking pictures.

IMG_6329b
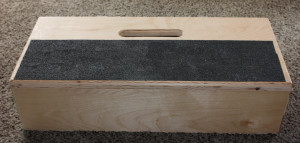
I did have a chance to make a step platform for her based on one they had at the rehab facility, so I am able to include one picture with this post!


I don’t mind staying home—we feel closer to each other when we have to help each other out. Also, I have lots of things at home that I never seem to get around to, including editing and posting pictures from several past trips. So I am looking forward to using the time to catch up on those things. You will probably see several posts from me in the near future with new pictures from old trips.

Progress Finally!

I have not posted much since my return from Germany, but I have been busy.  Mostly, I’ve been working in my workshop, or more accurately, working on my workshop. I have been building a new work bench, since the one in the old shop was built in.  Unfortunately, I seem to have forgotten most of what meager woodworking skill I ever had, and I have made many mistakes.  Since it’s just a work bench, it doesn’t have to be pretty. On the other hand, many of my mistakes have caused do-overs, which has really slowed things down. Another diversion that slowed things down was that I was able to get a good deal on some used power tools, including a much better miter saw and a drill press (for those of you who know what those things are.) I saved a lot of money, but still had to spend quite a bit to get everything.  I sure appreciate Janie’s support of this hobby and her encouragement whenever I came home after another series of mistakes.

A couple of days ago, I approached the end of Phase I, but didn’t quite make it before I ran out of time and energy.  Today I reached that milestone. I was able to “dry fit” the base together so that I could see what it would look like.

IMG_6094 (Small)

Next, I had to take the whole thing apart to put a coat of finish on the parts.

IMG_6095 (Small)I’m heading on a little trip with Janie and our granddaughters, but when I get back, I can reassemble the bench and move on to Phase II, installing the top, a lower shelf, a woodworker’s vise and wheels.

Back to the Workshop

I finally got back to my workshop project today. It’s hard to do much without a work bench so I am building one. (It’s also hard to build a workbench when you don’t have a bench.) Today I spent a couple of hours measuring, setting up and cutting the pieces for the base, as well as cutting channels in these support pieces.  It takes some patience. Each one has to be done in two cuts–three would have been better. Each cut takes about 5 min. because you can’t rush them without damaging the tools.

IMG_5166a

Knots

I forgot to mention in my last post that another activity I’ve been doing is learning how to make things from paracord. I’ve always enjoyed tying knots.

image

I just finished this belt loop  hammer holder. I’m going to try another one so that I have one for home and one for the shop. I may make some other tool holders for the shop.


In looking for other projects to try, about all I find is a variety of bracelets and watch bands or survival gear. If anyone is aware of some more useful projects, please let me know.

More Workshop Progress

I spent the day at the shop getting organized. I planned to start last week, but a cold got to me.

I had some pegboard left over from the old shop, so started with that in order to get my tools out of the packing boxes.

IMG_2676

I also got my parts organizers off the floor.

IMG_2677

My crosscut sled is also hanging up next to the organizers

Finally, I was able to mount my foldaway support system that holds either the miter saw table or my router table.  Here is the set up for the miter saw table.

IMG_2680


After a busy day, I finished off with a concert by UW Music students performing baroque works of Bach, Telemann and Handel.  A very good concert, and these preformances are very inexpensive!

Moving Day

Today was moving day for my workshop stuff from storage to my new digs!  I have enough electrical work done that I can postpone adding more outlets–and possibly lights–and start working on setting things up to work.  I didn’t put much away, but I did two important things:

IMAG0251a (Custom)

For those who don’t know the story, when I moved from my house to a condo, I lost my garage.  My son Jason and I built a workshop on his property.  During that project, he kept reminding me that it was just a shop, and that I shouldn’t be too much of a perfectionist.  After he passed away, I enlarged the photo of  him (taken in the door of the shop with his characteristic grin) and superimposed the words “It’s just a shop!” on it.  That picture hung in the shop until I had to move.  The plaque was given to me by Jason’s family for Christmas after the shop was completed.  Both items will now hang lovingly in my new shop.

I had the movers pile the stuff up in the shop area.  (Yes I let movers move the stuff up and down the stairs.)  Now I need to organize it enough so that I can find my tools and then build a workbench.

IMAG0253a (Custom)IMAG0255a (Custom)

It is very difficult to take pictures down in this basement, at least during the day because of the way the light comes in brightly through the windows.  When I have time, I’ll try to figure out a way to better control the exposures or mask them.

More Workshop

image

It doesn’t look much different, but today I installed to new low consumption but bright LED light fixtures, and two outlets. I didn’t get the outlets energized, but that will happen next. I may put off adding more outlets other than these, and get started moving my stuff in and building a workbench.

Workshop Progress

I’m finally making progress on setting up a shop. Here is the first step, getting an electrical circuit and outlets installed.

image


Here is the unfinished space before I start putting the workshop together.

image

Apple Cider

Sunday, Janie, Leslie and I went to a community cider-pressing event. Janie had experienced this as a girl growing up on an apple ranch, but Leslie and I had never seen it before. I bought several boxes of apples a couple of weeks ago with the idea of checking out the cider press from the NE Seattle Tool Library, but my reservation date was not until next week. Having never done it before, I was eager to take advantage of the Tool Library’s opportunity to participate in a group session. At the very least, it would give me a chance to see how it is done.


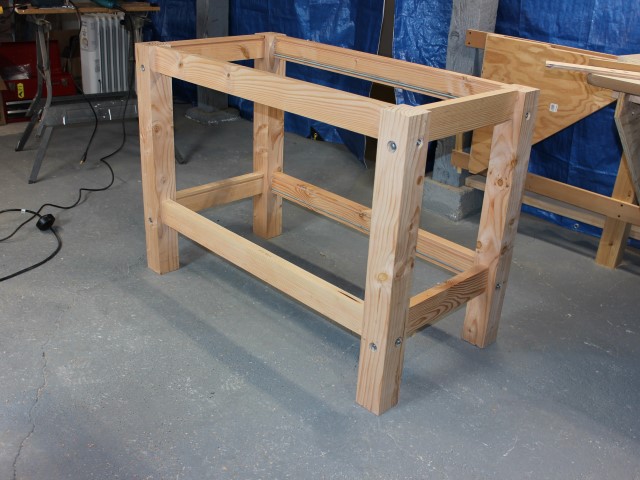
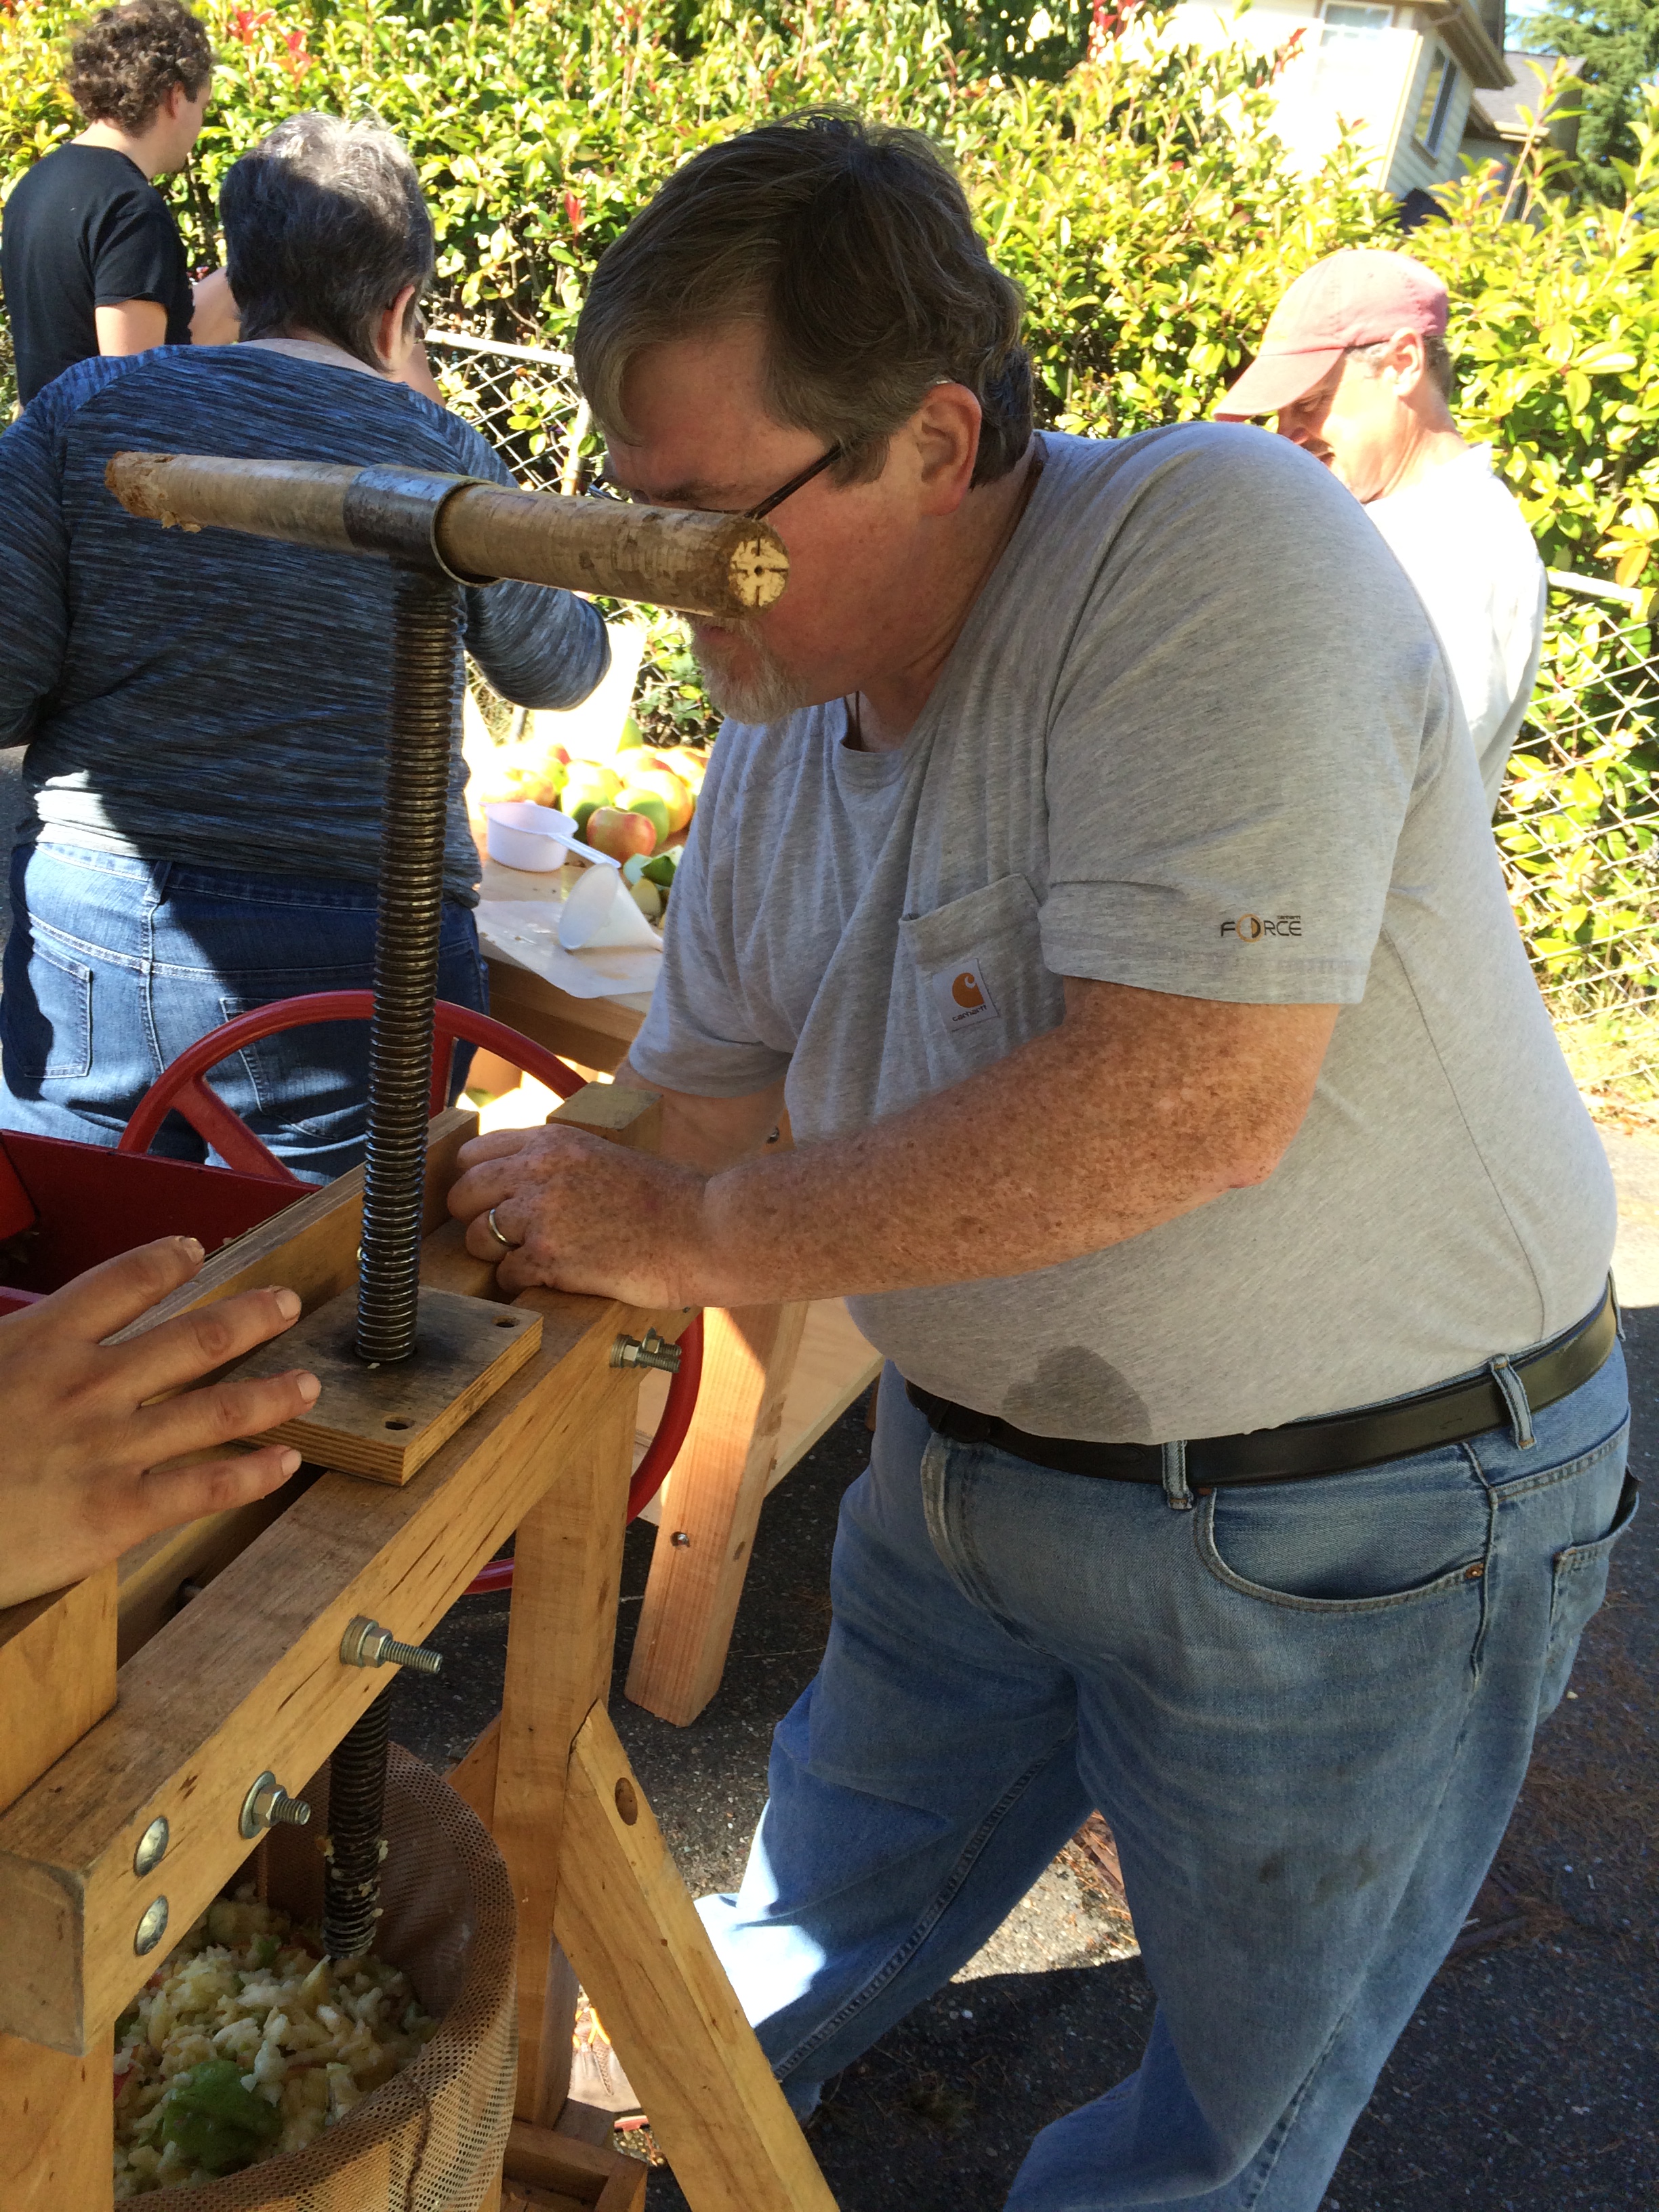
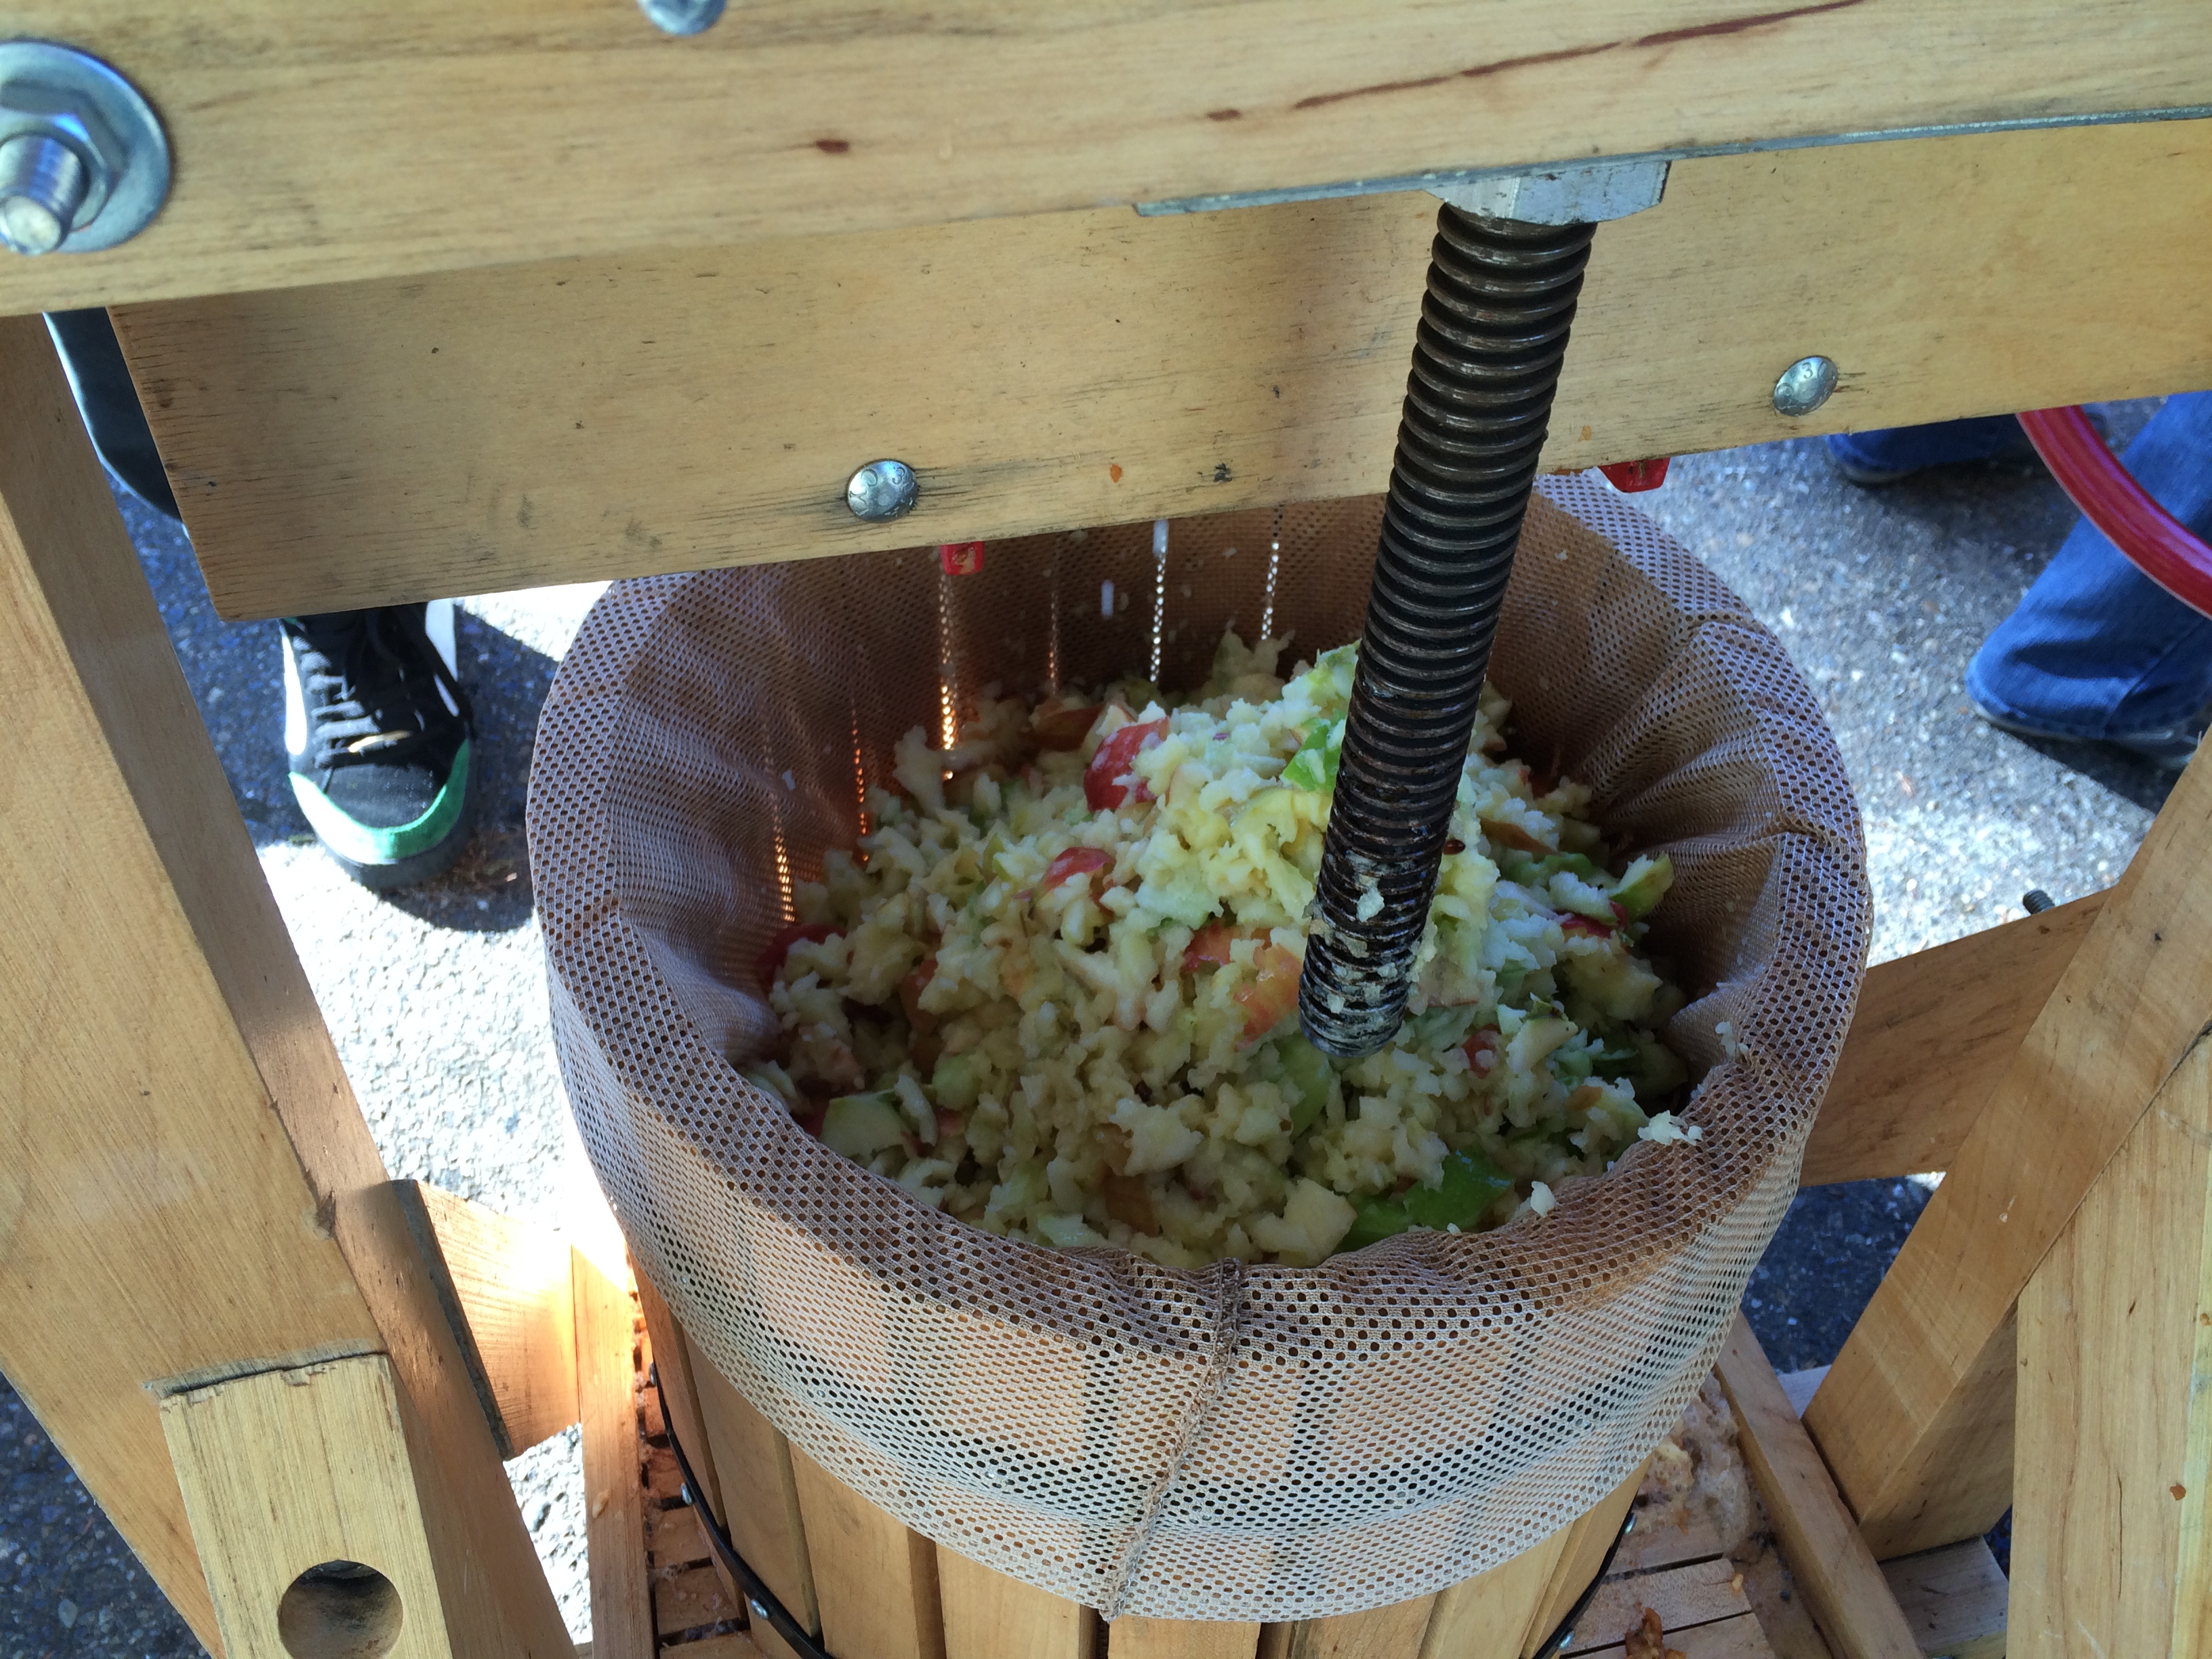
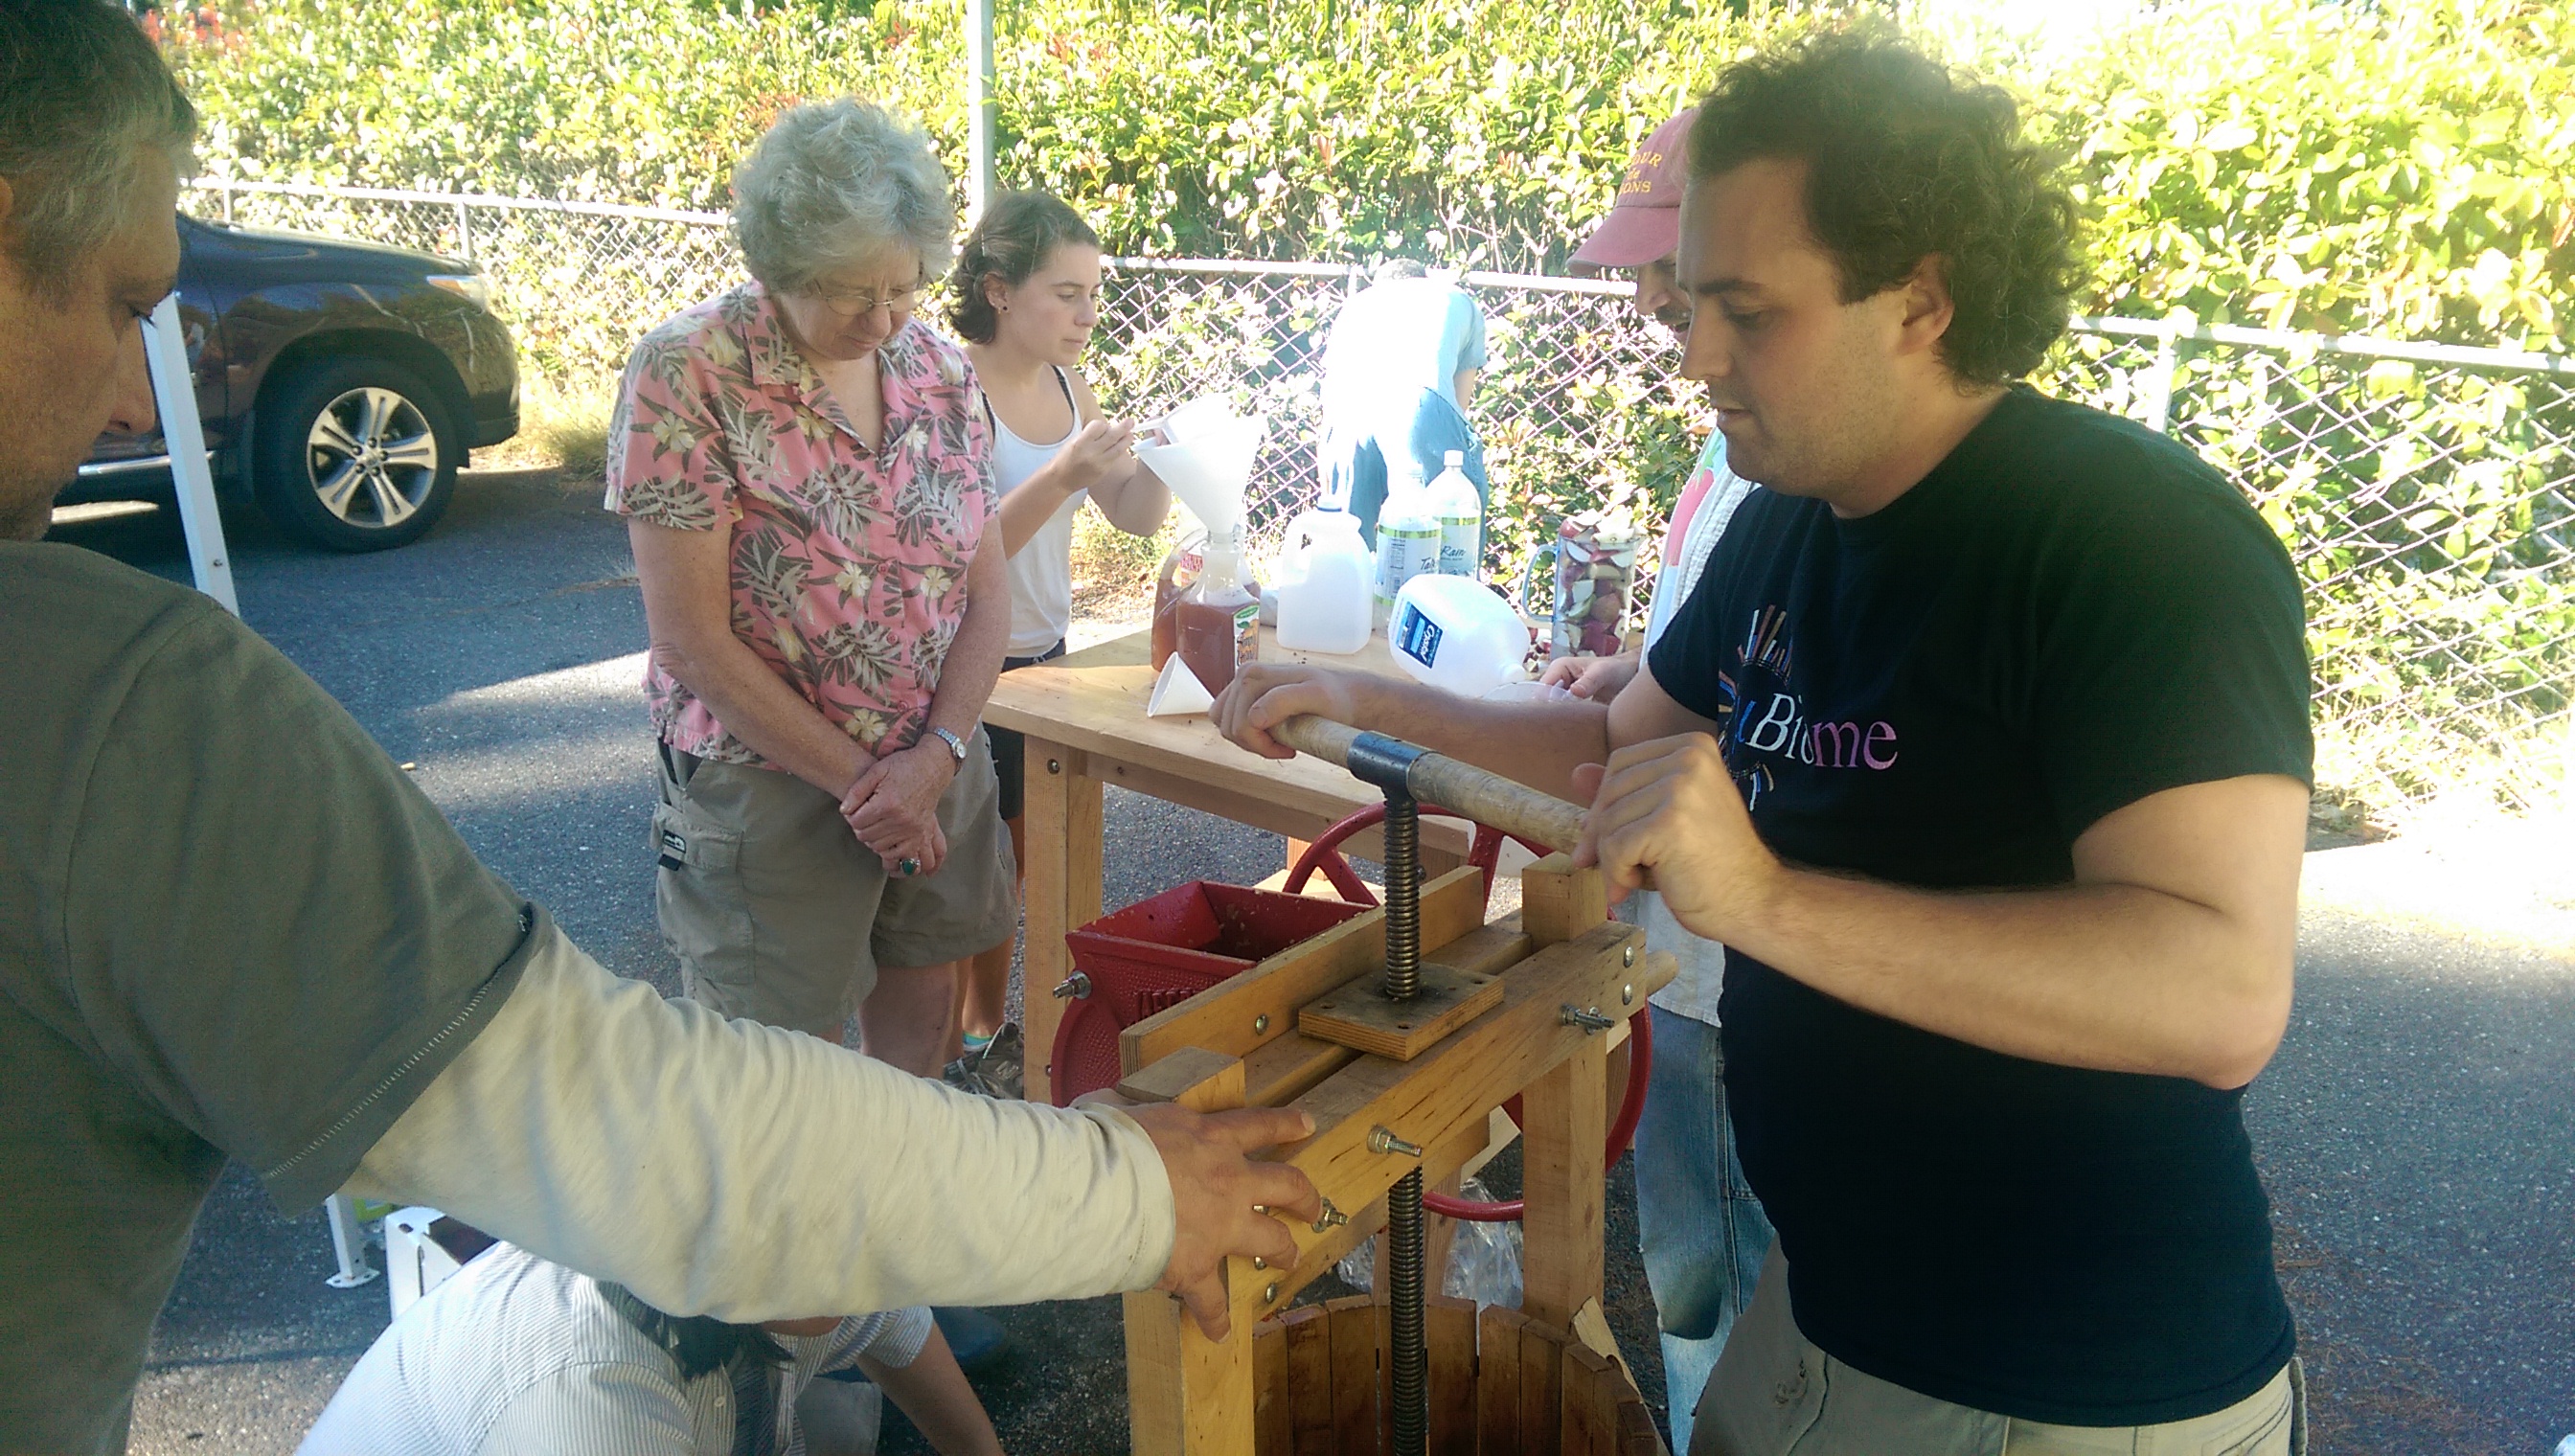
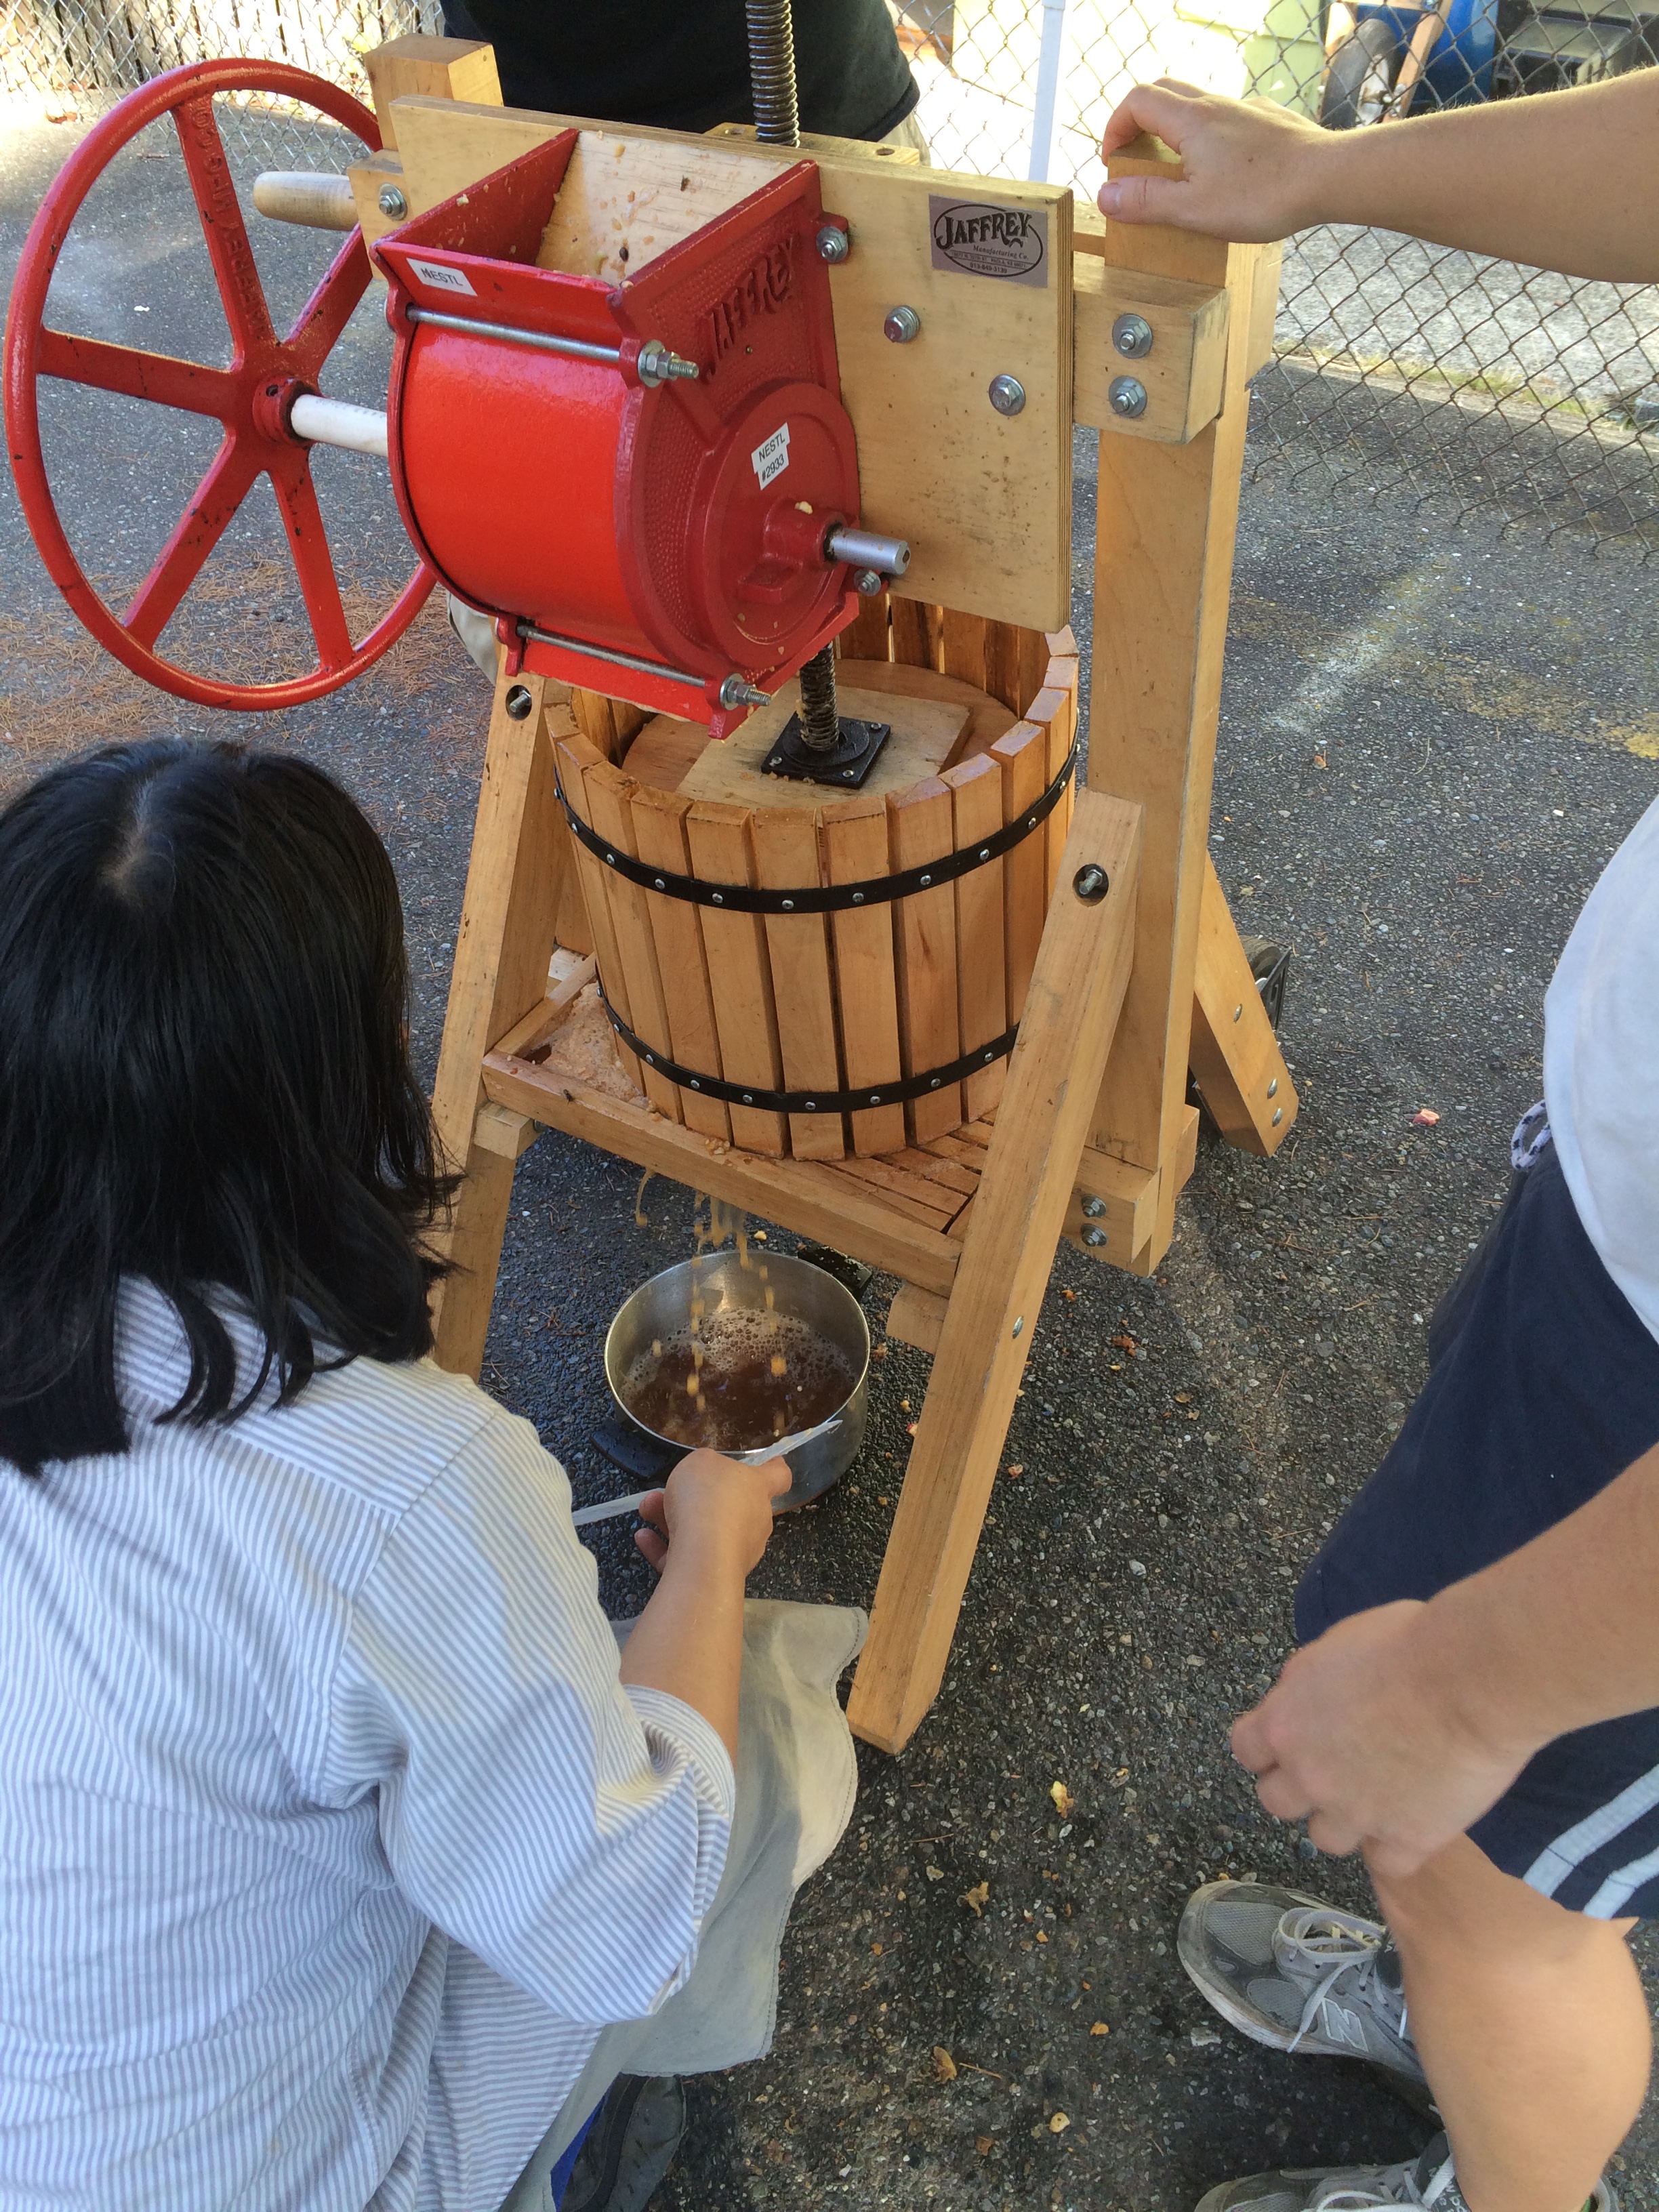
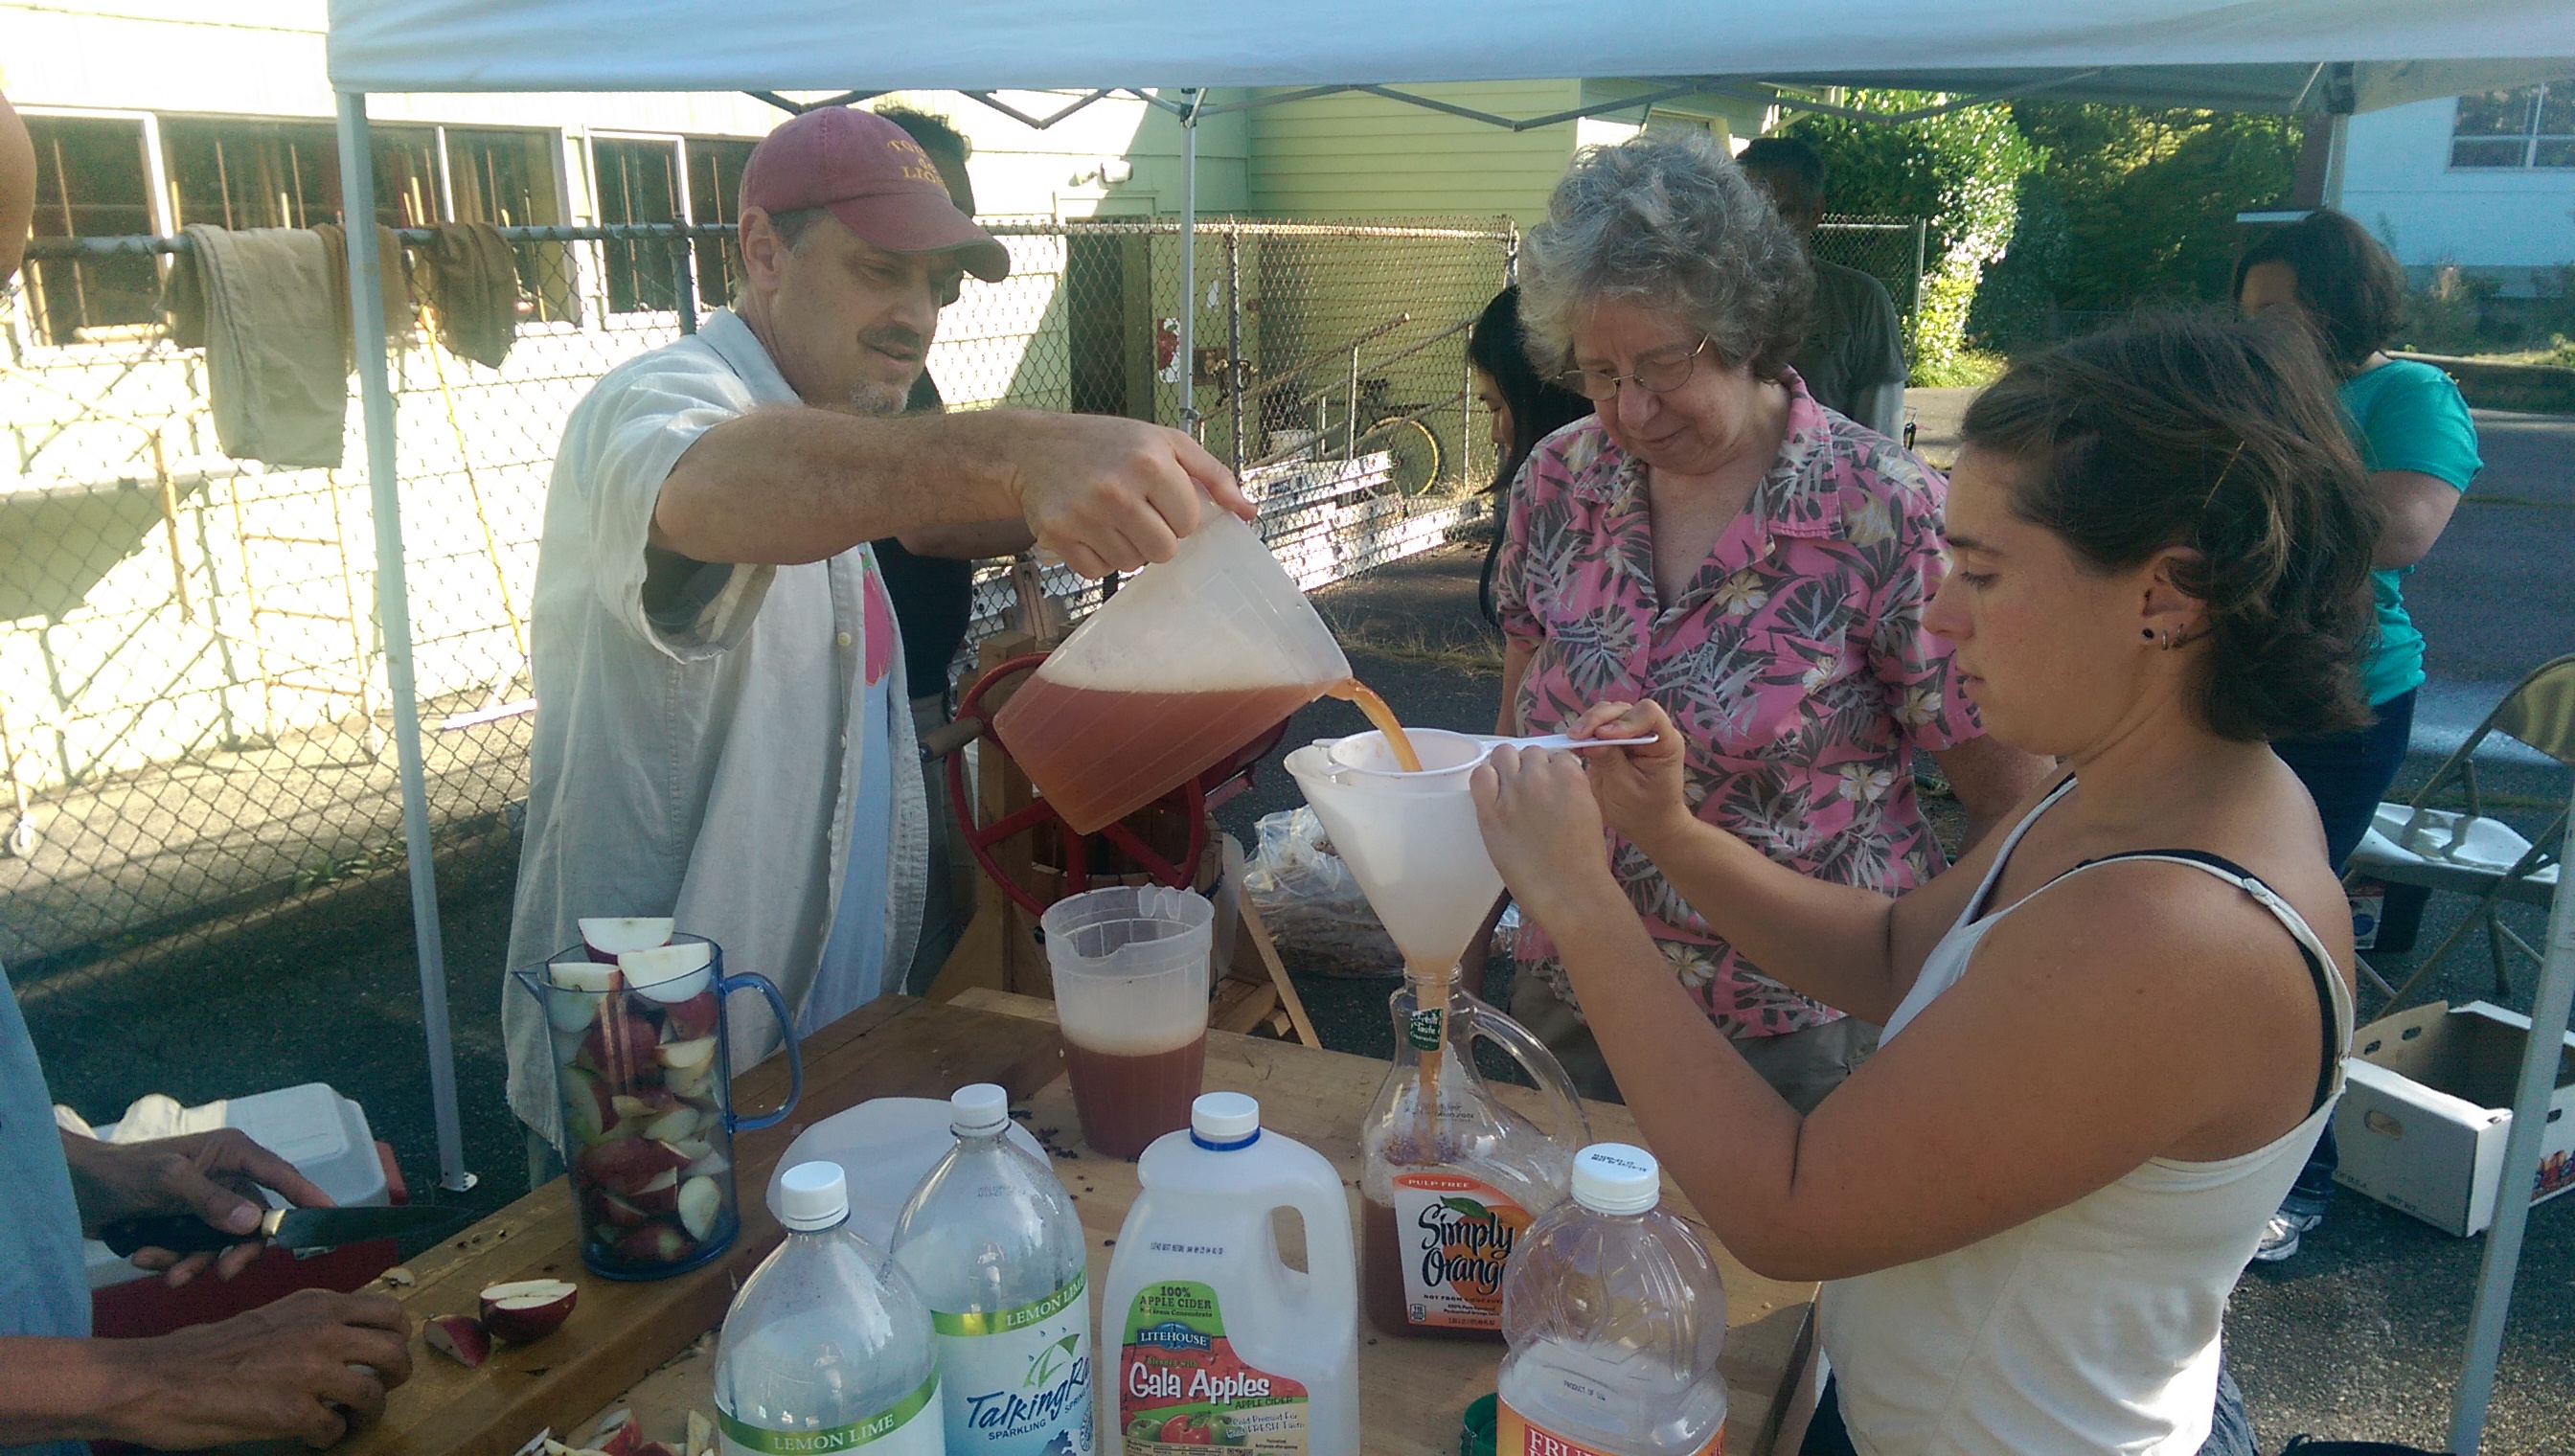
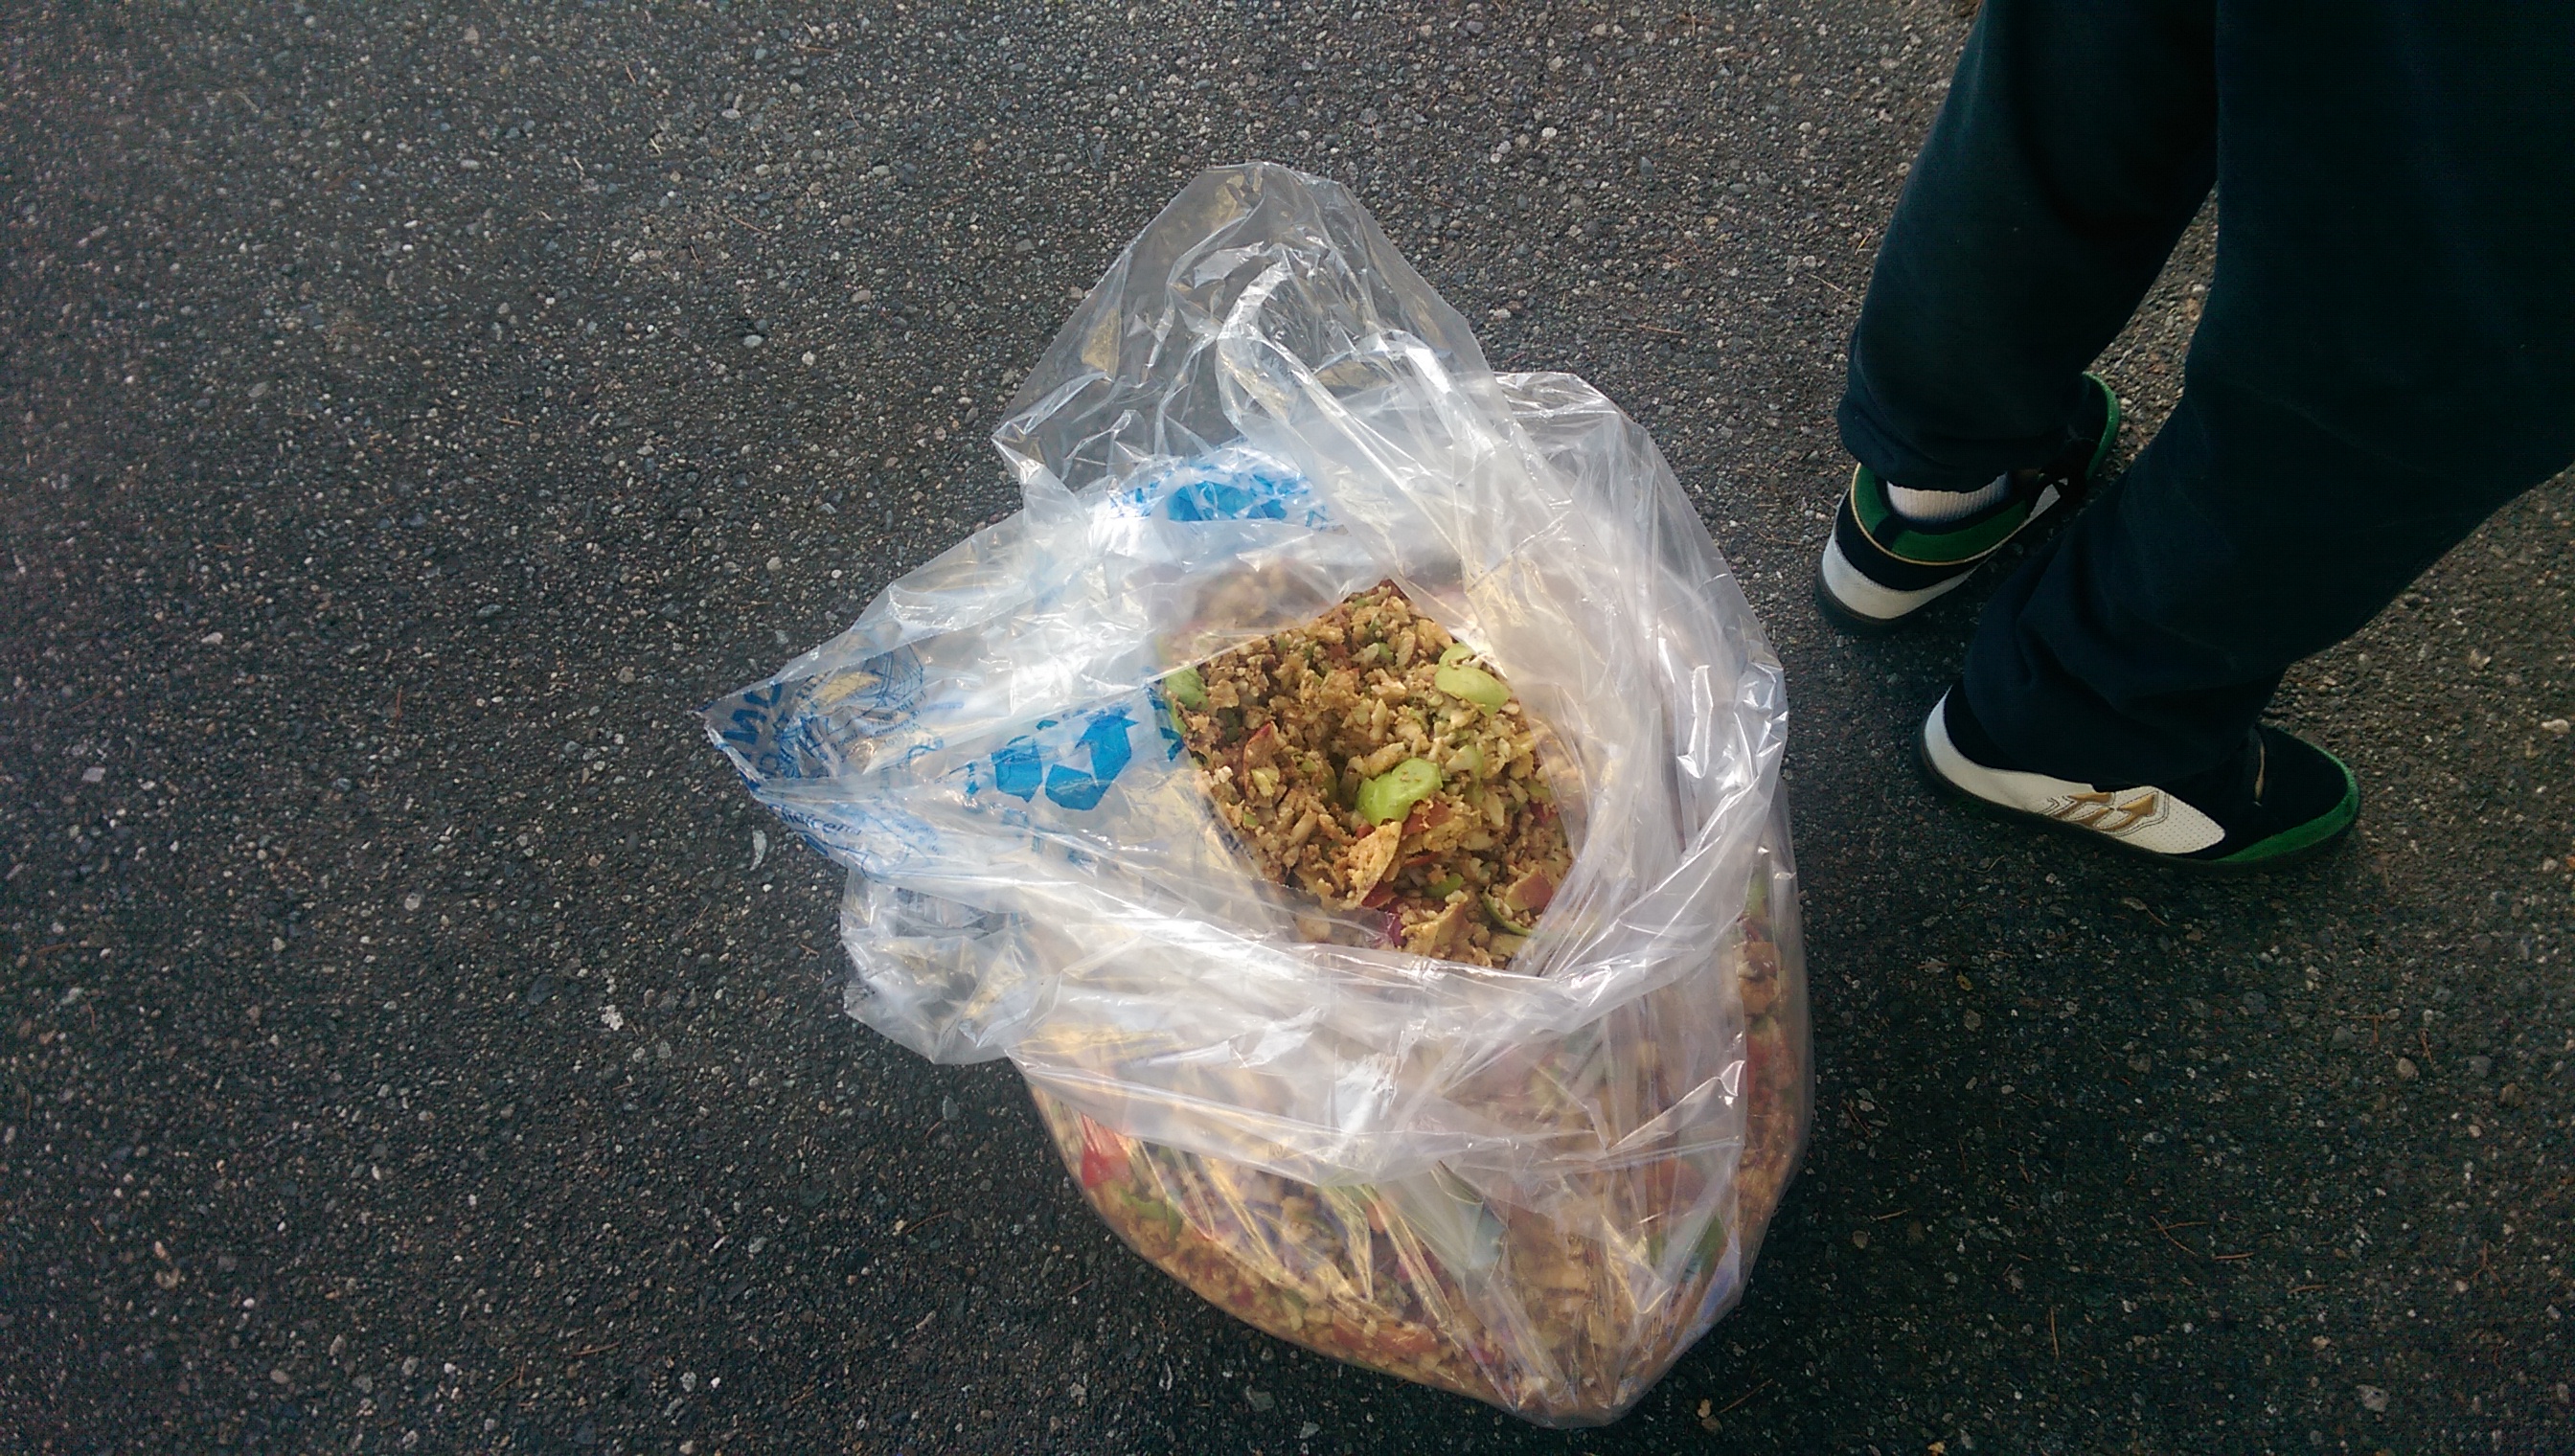
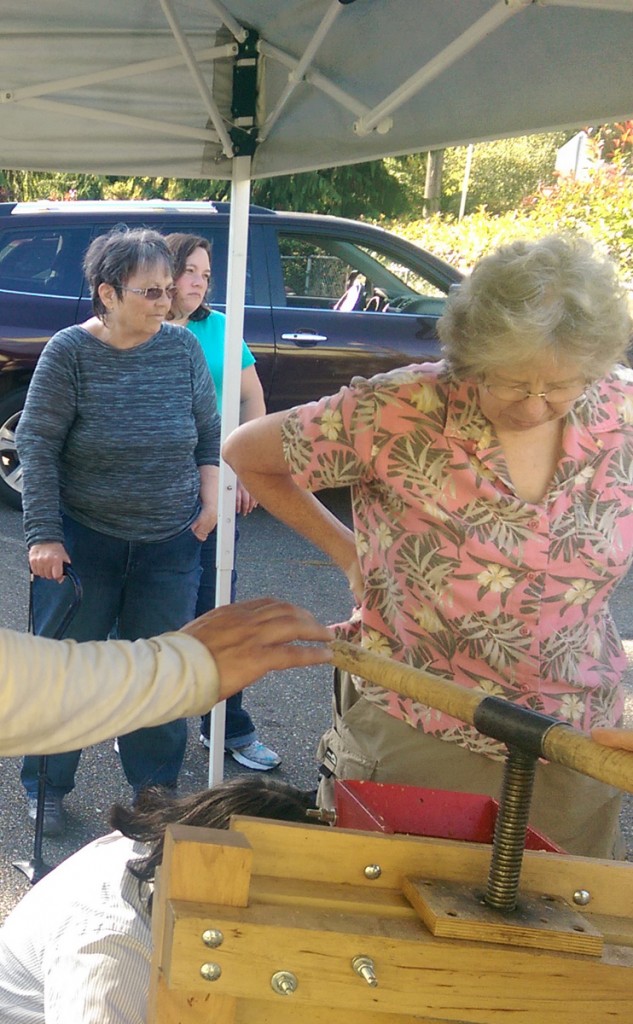
It turned out that we were able to press all of our apples after watching a couple of other families, and we helped others as well. Our friend
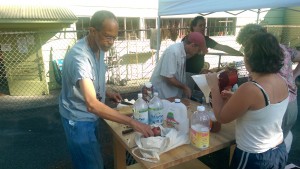
 Tim had told me that doing this as a group activity was more fun, and I think he was right.


We wound up with a little over 4 gallons of cider from the 3 boxes of apples we brought with us. That’s about 4 pounds of apples per quart. Even though the apples were less expensive at a fruit stand, I doubt that the juice was any less expensive than it costs to buy it in the store. I mixed 2/3 Honey Crisp with 1/3 Granny Smith apples. The juice is sort of tart, but not sour–I like it, but I think I could have used a 3 to 1 ratio.


IMAG0030


I Phone 100614 558


The left over pulp will go to someone’s goats!

Next week, we’ve been invited to Yakima to participate in another group pressing, and I’m looking forward to it! This time we’ll be guests of an apple grower, so it will be interesting to see whether the process is different.

Hope Chest Completed

Check out the Workshop Projects section for a pictorial progress report of the building of Leslie’s hope chest.  It either took 6 months or 20 years, depending when you start counting.  But it is done!  My first major woodworking project in the shop.

Katie Painted the Workshop

I got home from vacation on July 27 and discovered that Katie had painted the trim on the shop.  The shop looks sharp!  (The picture is on the Workshop page.)  By the way, the shop is now in use for a wood working project to build Leslie a hope chest.  It turns out however that the “hope” is that I hope I can pull it off!

More Workshop Progress!

We slowed down some on our progress because of my travels and waiting for the right weather to paint, but last weekend we got the weather we needed and got the shop painted inside and out.  Looks pretty good if I do say so myself, although we still need to paint the outside trim.  I’ve added another 1/2 dozen photos showing our progress.  Jason, Katie, Emma and Sarah got me a sign for my birthday, shown in the last photo.

Next step–literally–is to build a step for the small door and then work on the workbench and pegboard so that we can start putting stuff away.

More Workshop

We got a lot accomplished Labor Day weekend–insulation took two days and we were able to finish the sheet rocking in one day.  The pictures are current through Sept. 6.  Next week we’re off on a cruise, and when we get back, we get started on taping and mudding and/or painting the exterior.

Working on photo captions

Lots of pictures!  I’m working on adding captions to all the photos so it’s easier to see what they are.  This will take awhile, so there may be a break before I add other albums.